Sunday, December 25, 2016

Festive Baking - The Sultan´s Stars


Wishing all of you my friends and faithful readers and all of your families a very Merry Christmas and Happy Holidays! Or as we say around here "Frohe Weihnachten und Festtage!" These festive times would not feel right without a little sweet recipe from my kitchen.

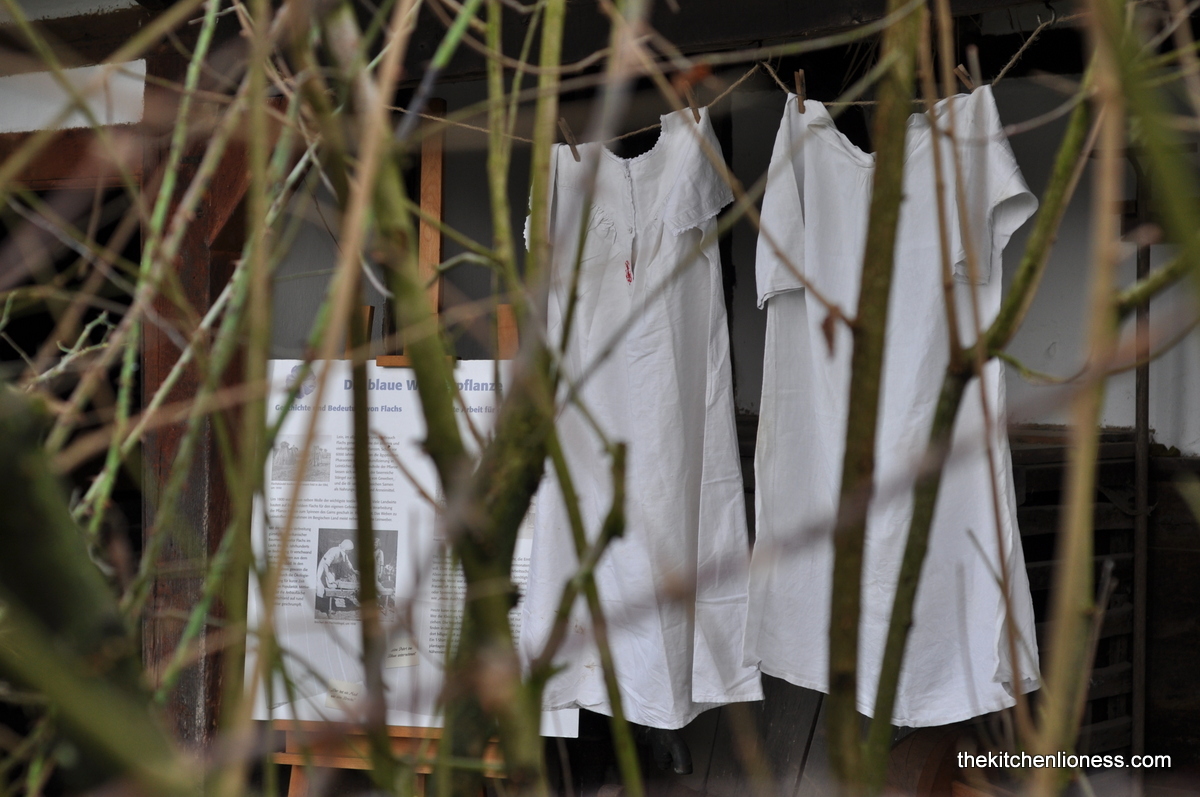
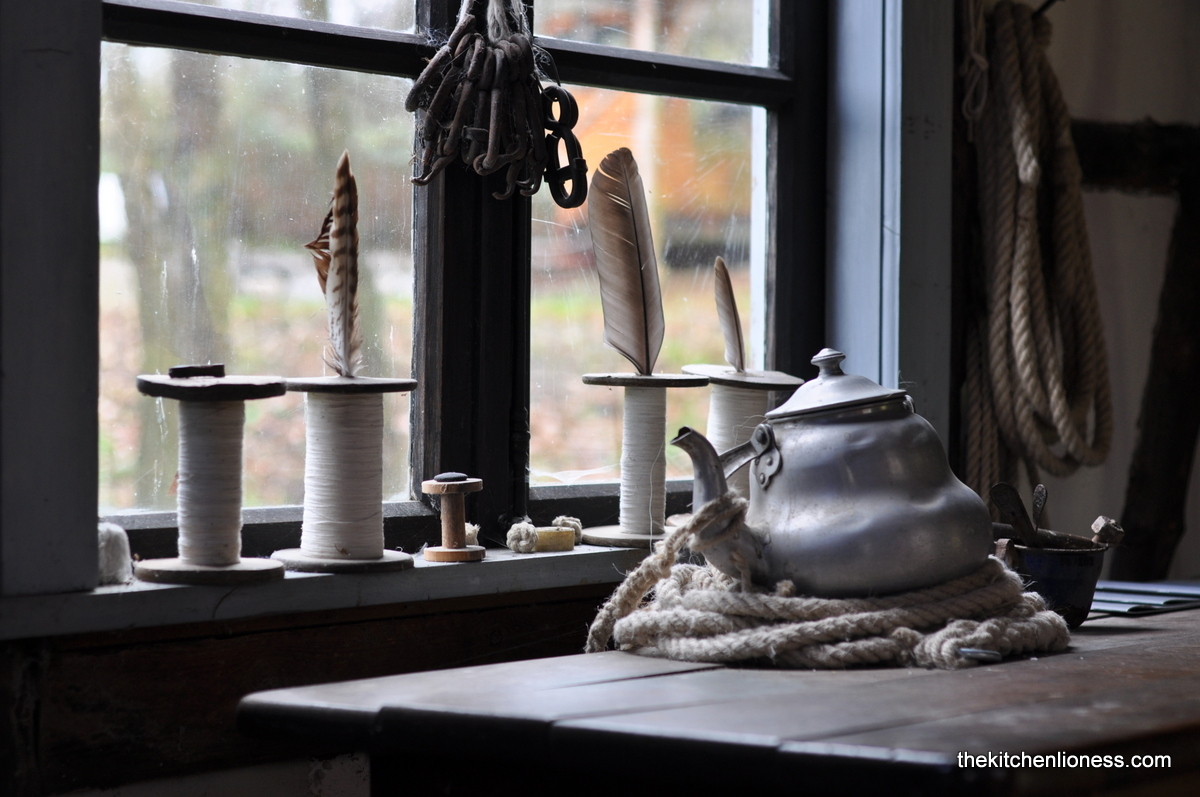
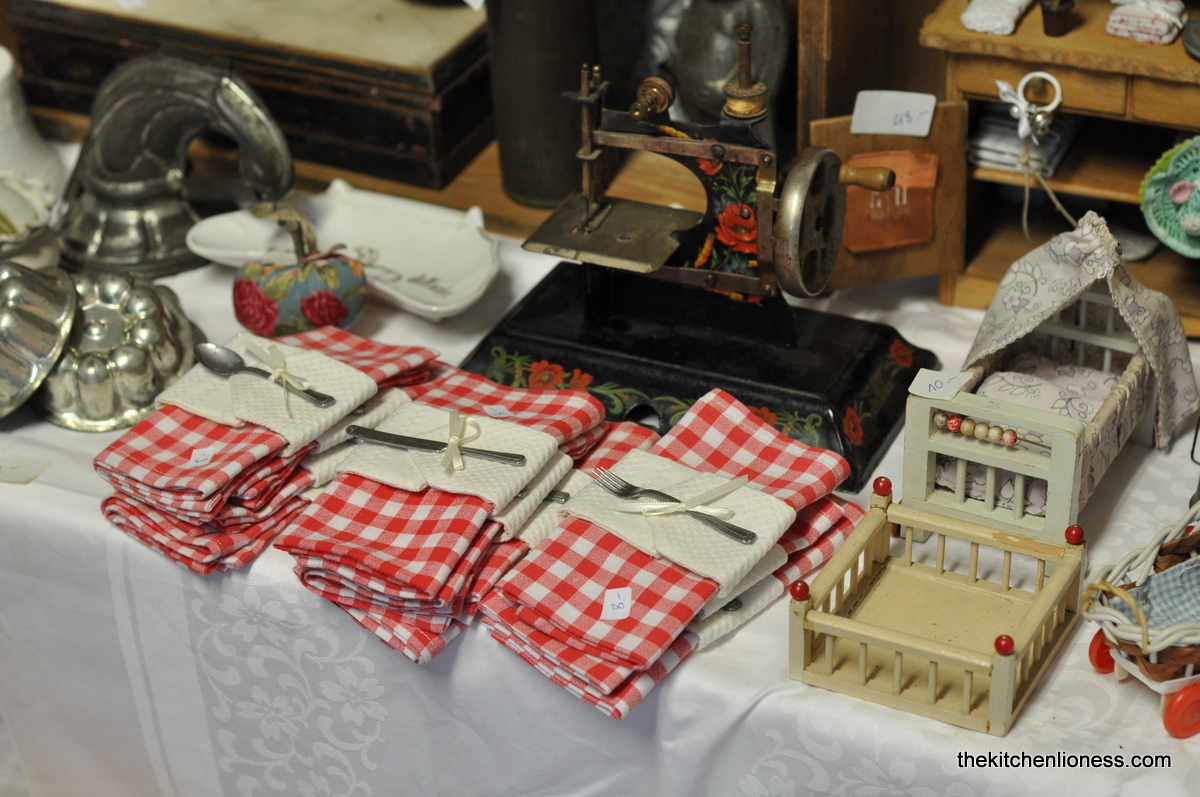
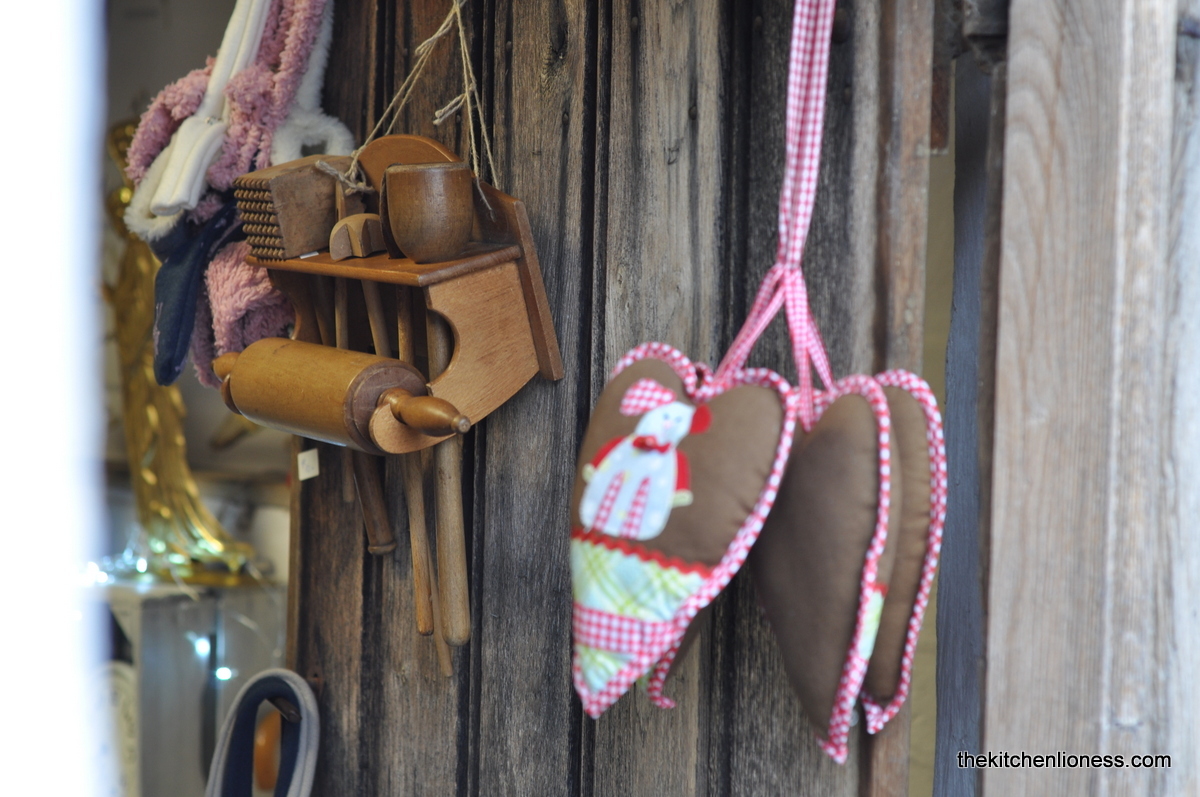
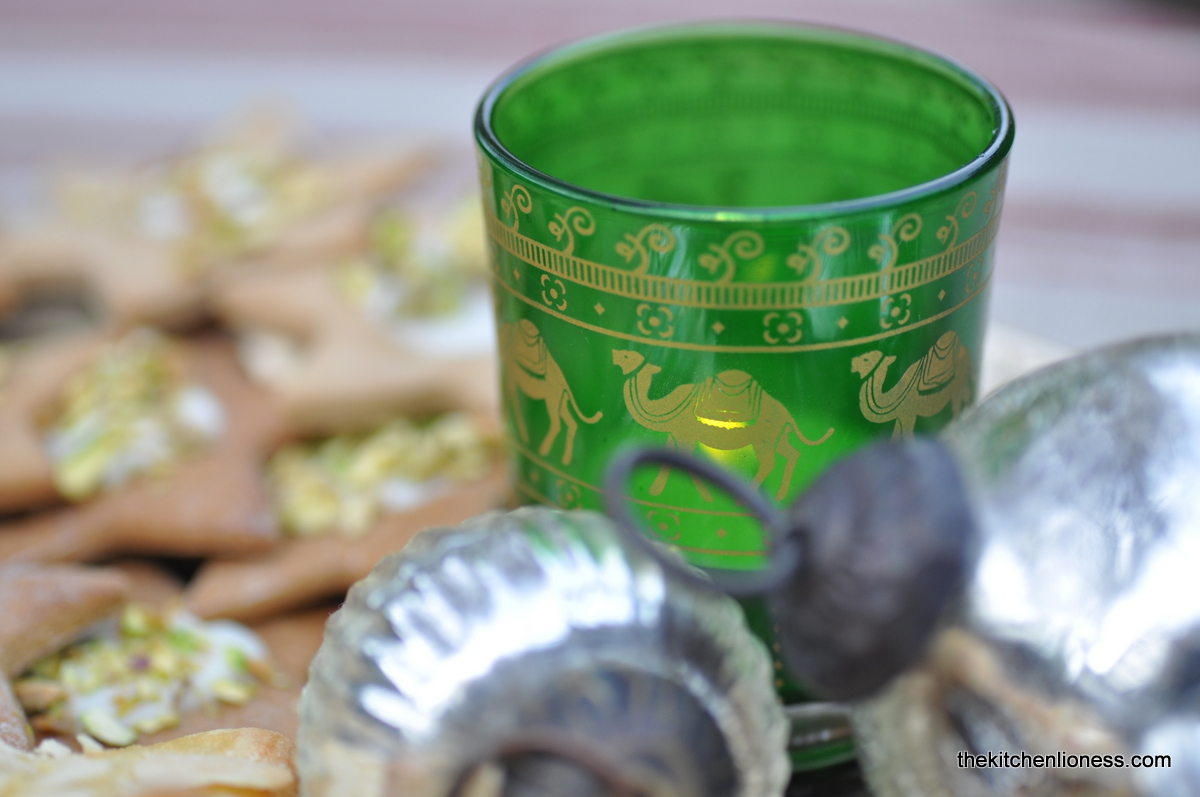
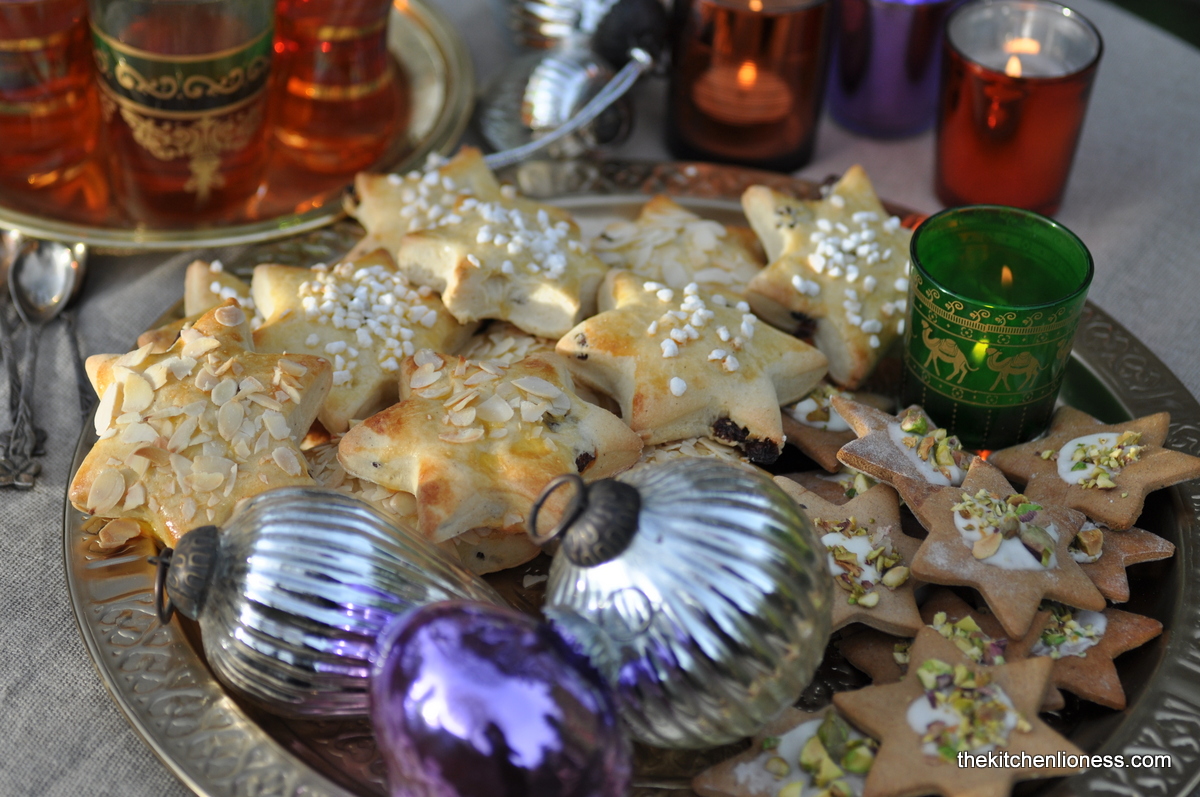
Of course, for obvious reasons, stars are a very popular choice for Holiday creations and I was inspired to bake my lovely Sultan' s Stars during our recent visit to an amazing Medieval Christmas market.


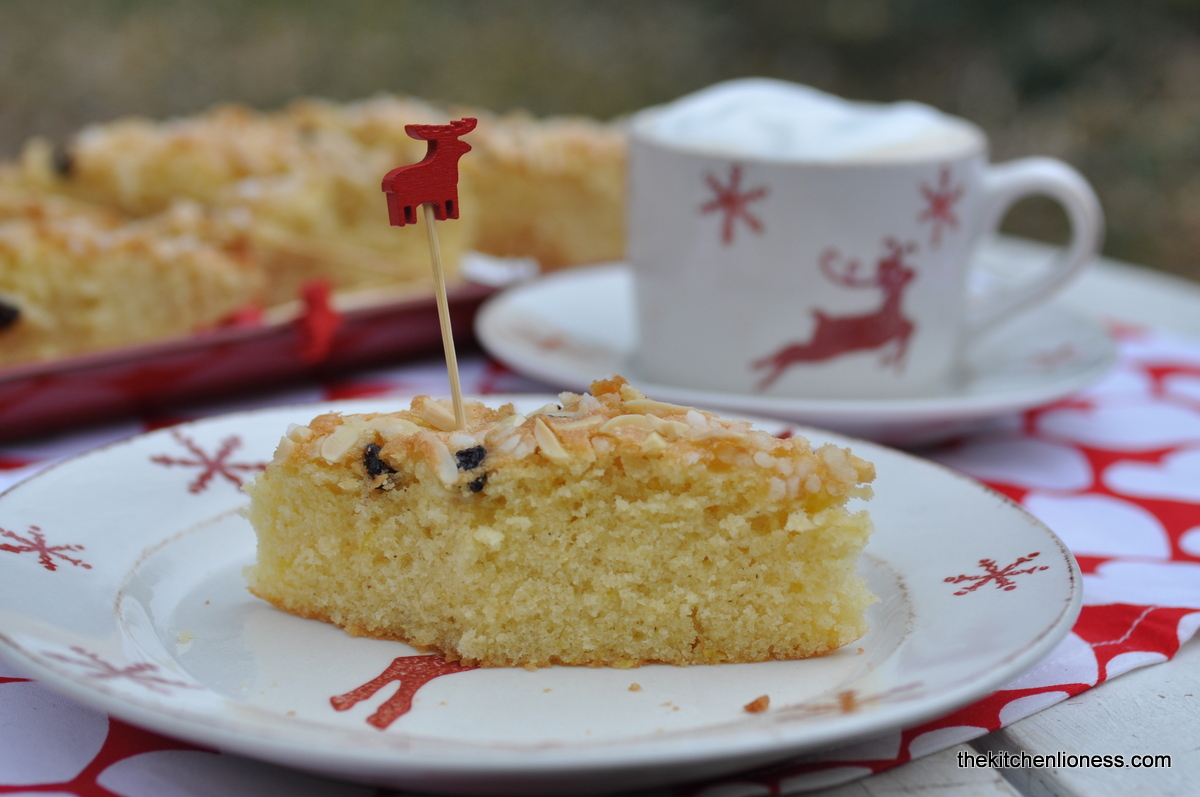
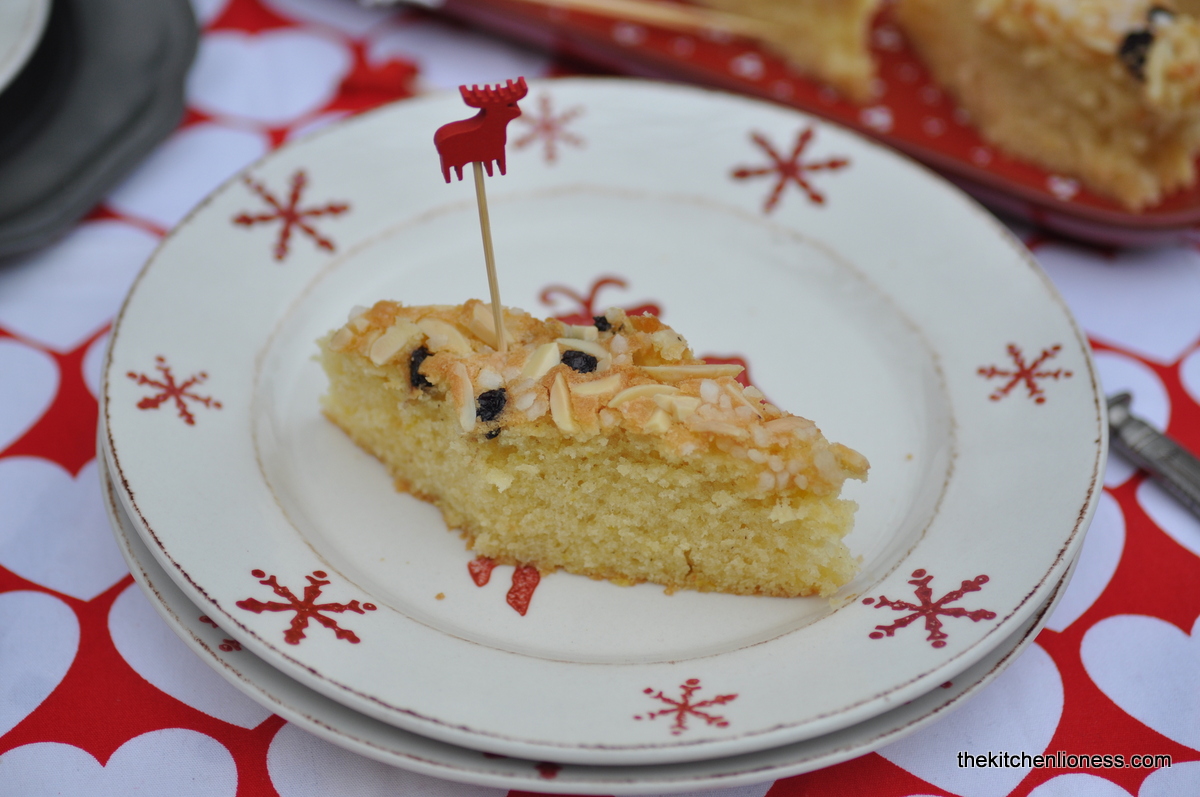
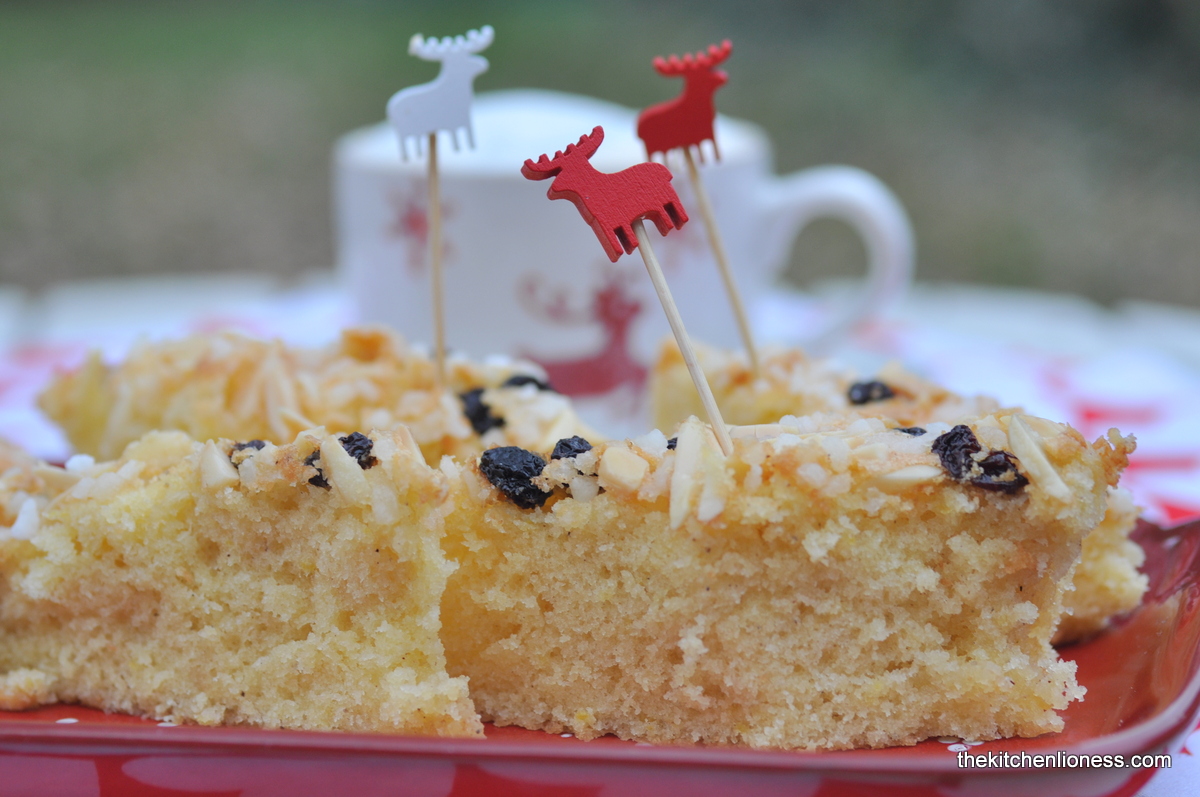
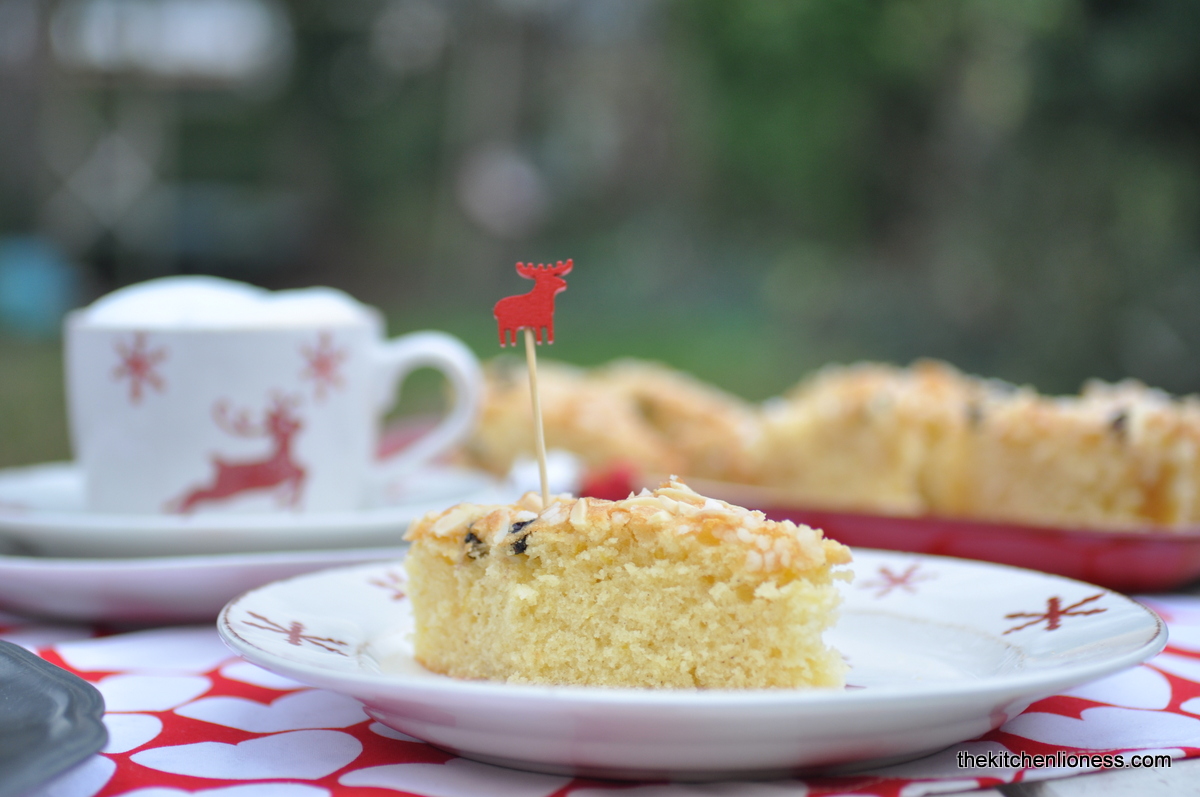
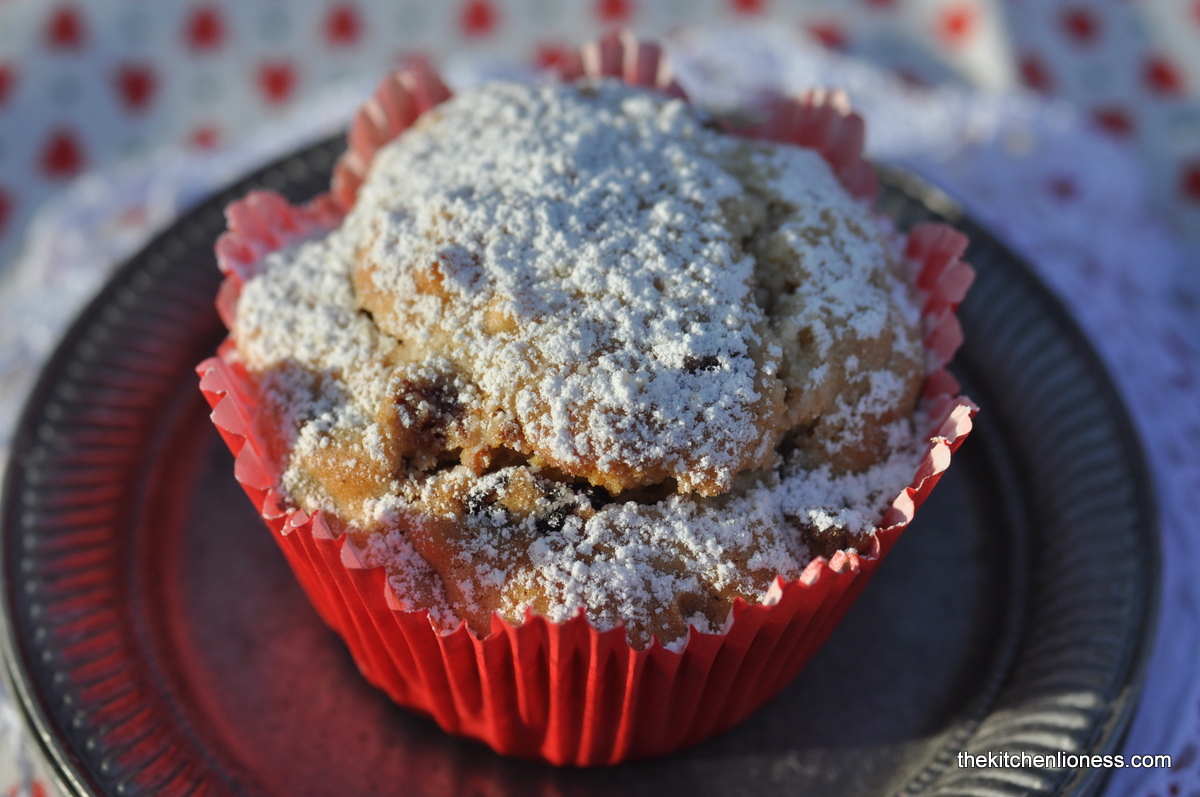
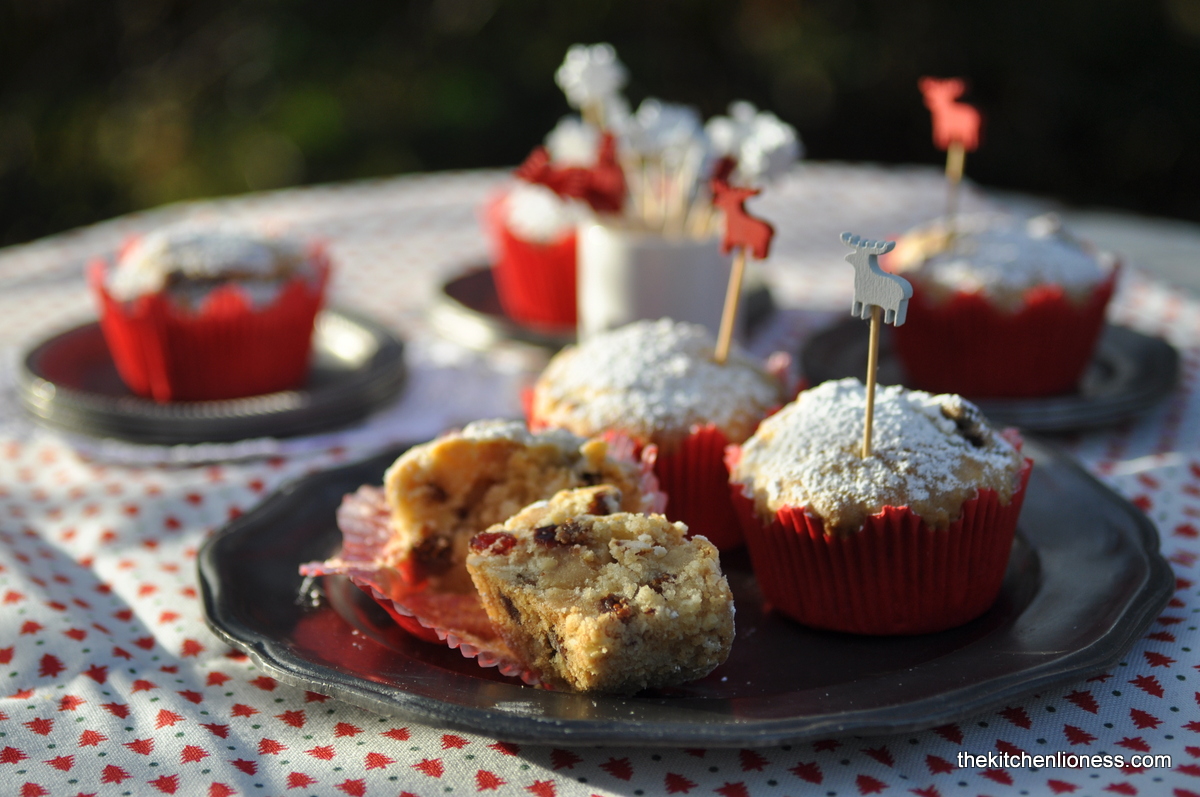
For my Sultan´s Stars you need to make a simle rich dough raised with yeast. The dough is flavored with butter, vanilla and lemon zest. To finish the stars, I brushed them with some egg yolk mixed with a bit of milk and topped them with thinly sliced almonds (you could also opt for chopped ones) and pearl sugar. They were a delicious addition, as they toast during baking to provide some crunch and flavor contrast.

I also added a small handful of raisins and sultanas to add some additional sweetness to the dough. Entirely optional, of course, but this is a nice addition if you enjoy dried fruits in your baked goods. I am pleased to say this all worked very well, and the result is an easy, fun recipe that will leave you with light, sweet and fragrant festive stars to enjoy during the holidays.


Sultan´s Stars

Ingredients
  • 500g strong flour or use AP (plain) flour
  • 30g fresh yeast
  • 1/4 l tepid milk
  • 50g butter, unsalted, melted
  • 50g superfine (baking) sugar
  • 1 1/2 tsps pure vanilla sugar
  • 1 egg (M), free range or organic 
  • a pinch of fine sea salt
  • zest of half a lemon (organic/untreated)
  • a handful of sultanas and/or raisins
  • 1 egg yolk (M), free range or organic mixed together with 1 tbsp milk
  • slithered almonds (or use chopped almonds)
  • a bit or pearl sugar

Preparation
  1. Sieve the flour in a bowl and form a pit.
  2. Put the crumbled yeast in the pit of the flour, add the milk to the yeast and stir together.
  3. Cover the bowl with a damp kitchen towel and let it rest for 15 minutes in a warm place.
  4. Add the butter, sugar, vanilla sugar, egg, salt, and lemon zest to the flour mixture and knead for about 5 minutes until you have a smooth dough.
  5. Add the raisins/sultanas if using and kneed some more.
  6. Transfer the dough to a greased medium bowl.
  7. Cover and let the dough rest in a warm place until it has doubled in volume (for another 60 minutes).
  8. Line two baking sheet with parchment paper (or use your Silpat baking mats).
  9. With a rolling pin, roll out the dough on a well-floured work surface and use a star-shaped cookie cutter to cut out as many stars as possble.
  10. Cover the stars and let them rise again for 15 minutes.
  11. Preheat your oven to 200°C (392°F).
  12. Brush with the beaten egg yolk/milk mixture and sprinkle with almonds and pearl sugar.
  13. Bake for about 15 to 20 minutes until golden.
  14. Let them cool on a cooling rack and enjoy. They are best eaten while still warm.


These Sultan´s Stars should be enjoyed with steaming glasses of your favorite tea, strong coffee, cocoa or a homemade mulled wine (Glühwein) that you spiced with cinnamon, cloves and star anise or even warm grape or apple juice. I would also quite happily much on one of these on a chilly winter evening too!


Hope you are spending a peaceful Christmas & Holidays with family and friends!
Ich wünsche euch ein schönes und besinnliches Weihnachtsfest und Feiertage im Kreise all eurer Lieben!


Friday, December 23, 2016

Mor Monsen's Kake – Norwegian Cake for Christmas


Norway’s  well-known Mor Monsens Kake (Mother Monsen’s Cake) is a rather classic Norwegian Christmas cake flavored with lemon zest and garnished with almonds, currants, and pearl sugar. It has been a beloved cake since the 19th century, ever since a Norwegian author wrote what is believed by some to be the first Norwegian cookbook. Hanna Winsnes, in her 1845 book entitled: Lærebog i de forskjellige Grene af Huusholdningen (which, apparently can be loosely translated as A manual On The Different Household Chores), included a recipe for this cake and attributed it to Mor Monsen (Mother Monsen) – whoever that lovely, inspiring person might have been.


This is a simple buttery cake that is a rather nice contrast to all those rich, sweet, spicy Spekulatius (speculoos), Printen, and Lebkuchen (ginger bread cookies) at this time of year. It is perfect with a cup of tea in the afternoon, but also wonderful with your morning coffee and utterly perfect after you made it home collapsing under the sheer weight of all those shopping bags from the last minute shopping and/or grocery spree.


All it takes to make this wonderful cake is creaming butter and sugar together and adding the lemon zest as well as the other cake ingredients, then spreading it all into a buttered and floured sheet pan. Sprinkle with almonds, currants, and pearl sugar, then bake. During baking, it will puff up a little, and some of the dried fruit and slithered nuts will sink down into the batter. Once golden, remove from the oven and cut into pieces – diamonds or triangles are the traditional shapes and you will have a cake that is simple yet elegant, already cut into serving pieces.


There are a lot of versions of this recipe out there and it was a bit unclear which flavor should be added to the batter. Naturally, cardamon came to my mind but in the end I settled for a bit of vanilla and some lemon zest – as I am really partial to that pairing.


Mor Monsens Kake - Mother Monsen´s Cake

Ingredients
  • 225g butter, unsalted, room temperature
  • 225g superfine baking (caster) sugar
  • 2 eggs (M), free-range or organic
  • 1 ½ tsp pure vanilla sugar OR ½ tsp pure vanilla extract
  • zest of ½ organic (untreated) lemon
  • 130g AP (plain) flour
  • 1 tsp baking powder
  • a pinch of fine sea salt
  • 25g blanched almonds, slithered
  • 40g currants
  • 20g pearl sugar

Preparation
  1. Preheat your oven to 180°C (356°F).
  2. Grease and line a deep baking pan (30 x 20 cm / 12 x 8 inches).
  3. In a medium bowl, whisk together the flour, baking powder and salt and set aside.
  4. Put the butter and sugar into a large bowl.
  5. Beat until the mixture is light and fluffy.
  6. Add the eggs one at a time, beating well after each addition.
  7. Stir in the vanilla (sugar or extract) and lemon zest, then fold in the flour.
  8. Spoon the batter into the baking tray and spread level.
  9. Sprinkle over the currants, almonds and pearl sugar.
  10. Bake for 20 to 25 minutes until the top is golden brown.
  11. Remove from the oven and leave to cool.
  12. Cut the cooled cake into diamonds or triangles to serve.


This is a quick and easy recipe to make, using mostly store cupboard and fridge ingredients. It can be stored for a few days in an airtight container, but also freezes very well for those times you fancy a bit of cake at short notice.


It is always nice to have an easy recipe up your sleeve and, personally, I like to make this Norwegian coffee cake when I am looking for an easy cake with those familiar flavors of vanilla and lemon as well as serious buttery goodness.

So as they say in Norway – Gledelig Jul! Or as we say around here - Frohe Weihnachten!


Sunday, December 18, 2016

Cooking from the CookForSyria Recipe Book - Labneh Balls and Green Freekeh Salad


Those of you that follow my blog, my cooking and baking adventures and my occasional social media appearances, may have noticed that I not only love to create and re-create traditional recipes from many different countries but that, often, I like to enter unknown territory. Food, like many other everyday things that surround us, is often a challenge. We want to rely on the well-known but we are also curious to test the unfamiliar.


Not that I wasn´t „Ottolenghied“ years ago and dove head first into new culinary adventures, that, among other things, involved stocking up on many a previously unknown ingredient. Nowadays my cupboard shelves are brimming with fabulous and exiting spices such as sumac, ras el hanout, berbere, Spanish smoked paprika (hot and mild), saffron threads, orange blossom water, and many many more.


At the end of the day,  when the rest of my family is already asleep and I am paying a nightly visit to my kitchen to see wether all is in order, I inhale the smells that still linger in my tiny kitchen even long after I have cleaned up…the previously unknown and now much beloved notes of many different spice mixes.


So, when an friend of mine who is a chef-teacher at a local cooking school, asked me wether I was interested in participating and writing about a cooking event that is aimed at getting aquainted with our „new neighbours“ all the while cooking and baking together once a month, I did not hesitate one bit. Although I must admit at being a bit overwhelmed at first at the sight of all that glorious, yet unknown food, I decided to calm my nerves by, what else, searching the internet for Syrian dishes. It did not take me long before I came across the wonderful UK site called CookForSyria.

„CookForSyria is a nation-wide (UK) fundraising initiative curated by Clerkenwell Boy and SUITCASE Magazine. The month-long campaign focused around Syrian cuisine and encouraged “everyone from the UK’s top chefs to people at home to cook and raise money in aid of UNICEF’s Syria Relief fund via Next Generation London (UNICEF’s youth branch). There are hopes that the initiative will then be continued globally.“


I ordered the Cook for Syria Recipe Book and while I am still impatiently waiting for my copy to arrive  – it will not be published before December 28 around here – I looked at the list of recipes that are already available online. Loving many of  the ideas, for starters, and because I had all the ingredients at hand, I made the Green Freekeh Salad first - utterly glorious is all I can say. I even had the Freekeh on hand…not bad.

The Green Freekeh Salad is made with freekeh and chickpeas and tons of herbs (mint, dill, Italian parsley), then cumin, garlic, pomegranate molasses, date vinegar as well as pumpkin and pomegranate seeds and a lovely finish of coarsely chopped smoked almonds. I served some freshly-brewed Mint Tea and Aubergine Boats alongside.


Since the second recipe required a twelve hour wait to drain the whey from organic Greek yogurt in a muslin cloth over my sink (that can only be done overnight at our house) – I made the Labneh Balls the next day.


Both recipes, the one for the Labneh Balls as well as the Green Freekeh Salad, are published in the recipe book and were graciously provided by chef Saima Khan, founder, private chef and caterer for The Hampstead Kitchen, based in Hampstead, North London, that „provides private chefs and catering to locals in Hampstead and neighbouring areas in and around London“.


We loved these, especially the kids. The drained yogurt balls are rolled in different herbs, seeds and nuts, such as dried mint or oregano, red za'atar, nigella seeds (baraka seeds), sesame seeds, smoked paprika, pistachio slivers, crushed smoked almonds, crushed dried rosebuds and flowers. And they do in fact look like little jewels. You can use them as spread on bread or crackers, as a canapé, or package them up and give them away as gifts to family and friends. What a delightful, colorful and delicious keeper-of-a-recipe!


So, now that I know that I do not have to be a stranger to Syrian cuisine and its bold and enticing flavors, I am looking forward to receiving my recipe book (which will be a late Christmas gift to myself this year) – and show it off at the cooking event – maybe I can even convince some of the participants to order a book or two as well. From all that I have seen, this is a wonderful recipe book - and if you need another reason to go out and get it here it is: a portion of the proceeds will go UNICEF’s Syria relief fund.


For more info on the CookForSyria initiative, please look here: http://cookforsyria.com

For more info about UNICEF Next Generation London, please look here: http://nextgenlondon.com and/or look up your local UNICEF chapter.

For more info on Clerkenwellboyec1, the curator of the CookForForSyria campaign, please visit his Instagram account: https://www.instagram.com/clerkenwellboyec1

For more info about Saima Khan and The Hamstead Kitchen, please look here: http://www.thehampsteadkitchen.com

To order the Cook For Syria Recipe Book, please visit your local bookstore or order online.

Please note that the recipe book has been included in the Observer - Guardian's Best Food Books of 2016 - see Guardian (UK).


Monday, December 12, 2016

Impressions from my favorite Christmas Market


As Christmas Markets go, I rather have less than more, a bit less of everything. These days, when life is so busy  and I am faced with many a butter-flour-sugar issue in my tiny kitchen, I seek the simple, the more quiet things in life, to calm my nerves and take a breather from the hectic pre-Christmas December rush.

And, as always, I was looking forward to our visit to the one-day Christmas event at our favorite open-air museum. So, I put together a small post with a few of my favorite impressions from yesterday´s visit.


An open-air museum is a type of museum that exhibits collections of buildings and artifacts out-of-doors. The concept of an open-air museum is said to have originated in Scandinavia in the late 19th century. These kinds of museums showcase often forgotten ways of life and household tasks to present day visitors. These tasks include cooking on a cast-iron stove, baking in a wood-fired oven, dyeing cloth with plant colors, drying veggies for storage, jaming, pickling, gardening, farming, breeding cattle, weaving, rope making, and forging.

And I was not disappointed with yesterday´s visit – looking at the charming, yet simple decorations around the various timber-framed houses, was pure joy.


These vintage linen shirts were hung out to dry on a clothline adorned with wooden cloth pins and were part of a charming display that explained the use of blue dyeing plants.


It was no surprise that I was totally charmed by the simple straw star decorations ("Strohsterne") on the Christmas trees on display  –  did you know that the first written account of a “Christmas tree” appeared in the year 1605. German citizens used to decorate the trees with roses cut out of colored paper, apples, wafers, gold-foil, and sweets. More than 100 years later,  people started to decorate trees and homes with candles. By the early 1900s offering gifts became an integral part of Christmas celebrations along with the Christmas tree decorations.

Straw stars ornaments are a traditional German decoration. Stars made out of straw go back to times when people couldn't afford decorations at Christmas and therefore used a material that was common in most households: straw. Straw was not only inexpensive, it is also easy to bend and cut. For many, however, straw decorations are a reminder of the baby Jesus, lying in his straw-filled crib in Bethlehem.


Sand. Soap. Soda. Vintage enamel vessels for those cleaning necessities - even during the holidays.

German kitchens used to have a decorative shelf with a set of pots, neat and tidy, filled with three essentials for a clean home: soap, sand, and soda. Although English-speaking countries never had a special storage unit like this, and didn’t think of the “three esses” as a trio, they also made much use of sandsoda and soap. Soda in the late 19th century was factory-made and quite affordable.  Among other things, it helps with laundry and with taking out stains. Soap, like soda, was quite plentiful by 1900, not too expensive, and was available in powder or flakes suitable for filling a nice enamel pots. And sand had been a basic cleaning agent for centuries - for scrubbing floors, scouring iron cooking pots, and much more.


Ah, those half-timbered houses. And the adorable seasonal decorations - traditional colors are red and green.

Evergreen plants, like fir branches, holly, ivy and mistletoe have been used for thousands of years to decorate and brighten up buildings during the long dark winter. They also reminded people that spring would come and that winter wouldn't last forever. An early use of red at Christmas were the apples on the paradise tree. Red is also the color of Holly berries, which are said to represent the blood of Jesus when he died on the cross, red is also the color of Bishops robes


Below is the picture I took in the ropeyard. There you can watch a ropemaker while he makes ropes, demonstrates rope knots and explains all about his amazing craft.


I love those wicker baskets that were used for collecting rags "to feed" the 100-year-old rag shredder - all on display in one of the historic buildings.


Collectibles. Vintage wooden Christmas ornaments for sale. I definitely have a soft spot for wooden ornaments in my heart. They remind me of my grandmother’s Christmas tree and amy childhood. There are a few that I seriously want to add to my collection this year!


Mini cake pans, a miniature doll sewing machine and red and white checkered linen napkins with tiny cutlery for sale. Wouldn´t you just love to receive those as a gift?!


And, of course, these wooden kitchen tools caught my attention – loved the rolling pin, meat tenderizing mallet, beater, and butter churn.


So, there, I took a brief moment and indulged in a few impressons from the things I treasure the most these days.Now, I believe, it is time to get back into the kitchen to bake a few of our beloved Christmas treats and plunge head first into the hustle and bustle of December.


Sunday, December 4, 2016

Second Sunday of Advent - A Recipe for Marzipan Stollen Muffins and Stollen Spice Mix


As far as the classic German Christmas cake called Stollen, Christmas Stollen (or Weihnachtsstollen), is concerned, it comes in many different shapes and sizes these days – traditionally this is a rich, yeasted loaf enriched with fruit, cherries, nuts and citrus peel. When it comes out of the oven, it is brushed with tons melted butter, then covered thickly in icing sugar. Don´t get me wrong, we enjoy the classic German Stollen – if you are looking for a more traditional Christmas Stollen, you can visit my blog, I posted a wonderful recipe here – but this year, which seems to be busier than ever, I thought I'd transform a true classic into muffins for a quicker result with just as much flavor!


Stollen recipes also have a lot of symbolism and history. There are records and recipes in Germany as far back as the 1300s, and the marzipan wrapped in the dough symbolises the infant swaddled in cloth. I really like this idea of symbolism, and it is nice that these traditions are still with us, all these years later.


Marzipan Stollen Muffins
(Author: The Kitchen Lioness)

Ingredients for the Muffins
  • 150g butter, unsalted, room temperature
  • 100g superfine (caster) baking sugar
  • 1 ½ tsp pure vanilla sugar (Bourbon Vanille Zucker)
  • 2 eggs (M), free-range or organic
  • 200g AP (plain) flour 
  • 2 tsp baking powder (Weinsteinbackpulver)
  • ¼ tsp fine sea salt
  • 1 ¼  tsp Stollen Spice Mix* (or you can substitute ½  tsp Mixed Spice**  with ½ tsp Ceylon cinnamon, and ¼  tsp freshly grated nutmeg)
  • 100ml milk, room temperature (I use 3.5 %)
  • 75g dried cranberries, chopped roughly if too large (you can use raisins, sultanas aka golden raisins, or dried cherries instead)
  • 75g dried figs, chopped (you can use Mixed Peel aka candied lemon and orange peel instead)
  • 60g Marzipan, diced (I use Lübecker Marzipan)
  • 60g blanched whole almonds, finely chopped

Ingredients for the Butter-Sugar Topping
  • 25 grams, butter, unsalted, melted
  • 3 tbsp icing sugar

In Addition
  • a 12-cup capacity muffin pan
  • 12 festive paper liners or silicone molds
  • pastry brush
  • sieve


Preparation of the Stollen Muffins
  1. Pre-heat your oven to 180° C (356°F).
  2. Line a 12-cup muffin pan with muffin papers or silicone inserts (I used festive red tulip paper liners).
  3. In a medium bowl, cream together the butter, sugar and vanilla sugar until light and fluffy (3 to 5 minutes).
  4. Add eggs to the creamed butter mixture, one at a time, making sure to cream well after each addition (about a minute for each egg).
  5. In another bowl, whisk together the flour, baking powder, salt, spice mix (or spices).
  6. Add the flour mixture to the butter mixture, alternately with the milk, beginning and ending with the flour mixture, beating just until combined after each addition.
  7. With a light touch, fold the dried fruit, marzipan and almonds into the batter.
  8. Divide the muffin batter among the 12 muffin cases (I use my 5 cm ice cream scoop here but you can also use tablespoons).
  9. Bake the Stollen Muffins for approximately 20 to 25 minutes or untli slightly risen and golden brown on top.
  10. Remove the muffin pan from the oven.
  11. When the muffins have cooled a little and are firm enough to handle, lift them out of the muffin pan and transfer onto a wire rack to cool for about 5 minutes.
  12. While the muffins are cooling, melt the butter, and use it to brush the warm muffins.
  13. Using a fine sieve, immediately dust the muffins with the icing sugar, and add another dusing of icing sugar just before serving. NOTE: Although these are best served warm or at room temperature, they will keep for up to 3 days in an airtight container. If you keep them for a few days, make sure to re-heat slightly before eating (microwave) and enjoy them either plain or broken up and slathered with unsalted butter and honey or marmalade.


Stollen Spice Mix / Stollengewürz
(feel free to double or triple the quantities, as needed)

Ingredients for the Stollen Spice Mix (*)
  • 1 tsp ground cinnamon (I always use Ceylon cinnamon)
  • 1/2 tsp ground ginger
  • 1/4 tsp ground cardamom
  • 1/8 tsp ground cloves
  • 1/8 tsp ground mace

Preparation of the Stollen Spice Mix
  1. Carefully measure out the spices.
  2. Mix all spices well.
  3. Scoop the mix into a spice jar with a tight-fitting lid.
  4. Label the jar (with date and contents).
  5. Use this mixture in recipes that call for Stollen Spice Mix
  6. Discard any leftovers after four months.
(**) Mixed Spice: British blend of sweet spices, similar to the Pumpkin Pie Spice used in the United States


These festive muffins capture the essence of a classic German Stollen with their cake like interior, delightful pockets of gooey almondy marzipan, a bit of crunch from the almonds as well as wonderful fruity flavors from the dried fuits as well as a must-have sugar-coated exterior. Flavored with warm Christmassy spices, they take on the feel of Advent season and Christmas.


We were really pleased how they turned out. They are ideal as Advent teatime treats but if you're planning to serve them on Christmas morning or for breakfast, you can cut down on prep time by weighing and mixing all your dry ingredients and lining your muffin tray on Christmas Eve or the night before. Then all that is left to do is a bit of creaming and baking which will fill your kitchen and house with wonderful seasonal aromas.

Wishing all of you a peaceful and delicious Advent season!
.

Sunday, November 20, 2016

Late Autumn Apple Tart with Fragipane


Before the Christmas baking season keeps a tight grip on me, I like to bake a few apple pies and cakes and tarts. This is a tradition I try to uphold every November. Being faithful to my personal autumn apple baking frenzy, I ususally bake a few old-time favorites such my Dutch Boterkoek with Autumn Apples (here) or my fancy Autumnal Cake with Vanilla Custard and Marzipan stuffed Apples (here). This year I was looking for a new recipe or a previously unknown twist to an old family favorite.


This past week the first Christmas markets have opened their doors around here. We even attended the first Christmas event at our kids´ school, and the smell of spices, almonds and baked goods reminded me, yet again, that I should be starting my Christmas baking soon – but not quite yet. There are still many wonderful varities of late autumn apples to be found  at the farmer`s markets and there is still time to bake apple desserts.


I wanted to bake something a bit different looking for a special someone the other day, a true apple lover that is, so a Late Autumn Apple Tart with Fragipane came to my mind, a tart that combines a buttery crisp pastry with a sweet almond cream and tart apples - simply wonderful and hard to beat.

I took a look at the apple design on the fabric I had bought to dress the dessert table and remembered the apple-shaped cookie cutter I bought in the other day, and decided I wanted apple cut-outs on my tart. I love the way it turned out and have baked it three times so far - not bad for this busy time of year.

And if you are really hard-pressed for time, and who isn´t these days, you can even "cheat" with a pre-bought good-quality pastry case and store-bought pastry. I was told that this tart would make a beautiful addition to a Thanksgiving dinner, perfect for those who don't care for Pumpkin Pie too much.


Late Autumn Apple Tart with Fragipane
(Author: The Kitchen Lioness)

Ingredients 

For the Pastry
  • 350g (12oz) AP (plain) flour, plus extra for dusting
  • 150g (6oz) cold butter, cubed, plus extra for greasing the pan
  • 50g (2oz) caster sugar
  • 2 eggs (M), free range (or organic if possible), beaten

For the Fragipane Filling
  • 75g (3oz) butter, softened
  • 75g (3oz) superfine (caster) sugar
  • 1 ½ tsp pure vanilla sugar
  • a pinch of fine sea salt
  • 2 eggs (M), free range or organic (if possible), beaten 
  • 75g (3oz) ground natural almonds (toast the almonds prior to grinding them to enhance their sweet almond flavor)
  • ½ tsp Ceylon cinnamon (optional)
  • 3 to 4 baking apples (depending on their size)
  • some freshly squeezed lemon juice
  • 1 egg (M), free-range or organic (if possible), beaten

For the Glaze
  • a few tbsps of apple jelly (or use strained apricot jam instead)
  • some chopped almonds


Preparation
  1. You will need a 28cm (11in) round, loose-bottomed fluted tart pan, 3 to 4cm (1 to 1.5in) deep.
  2. First make the pastry: either by mixing the flour and butter in a food processor or by hand – rubbing the flour and butter together with your fingertips, until the mixture resembles breadcrumbs. 
  3. Add the sugar and mix in briefly, then add the eggs and 1 to 2 tablespoons of water. 
  4. Mix until the pastry just holds together. 
  5. Divide the pastry in two. Form discs. Wrap in food wrap. Place in the refrigerator to chill for a good thirty minutes.
  6. Butter your tart/quiche pan and line the bottom with a round of baking parchment. Butter the parchment.
  7. After the pastry has chilled, take one disc out of the refrigerator, roll the pastry out on a floured surface as thinly as possible,and use to line the tart pan.
  8. Prick the base of the pastry all over with a fork.
  9. Place in the refrigerator while preparaing the fragipane fillling.
  10. To make the frangipane filling: place the butter, sugar, vanilla sugar and salt in the food processor and whizz until creamy, blend in the eggs, then mix in the ground almonds and cinnamon, if using.  NOTE: alternatively, beat together with a wooden spoon if making by hand.
  11. To prepare the apples: peel the apples, core and slice thinly. Place in a medium bowl and mix with a few drops of fresh lemon juice to prevent discoloration.
  12. Take the pastry-lined tart pan out of the refrigerator.
  13. Spoon the frangipane mixture into the pastry shell, spreading it evenly.
  14. Then arrange the apple slices on top of the fragipane. 
  15. Take the remaining pastry disc out of the refrigerator
  16. Roll the pastry out on the floured surface as thinly as possible, and using your cookie cutter, make some cut-outs- enough to cover your base.
  17. Take the beaten egg and dip the edges of your cut-outs into the egg and arange the cut-outs on top of your apple slices.
  18. Place the tart in the refrigerator while your oven pre-heats.
  19. Preheat the oven to 190°C (375°F) and place a heavy baking sheet inside to heat up.
  20. Place the tart pan on the hot baking sheet, and bake in the oven for 45 to 50 minutes until the pastry is crisp and the tart is golden brown.
  21. Take the tart out of the oven and place on a cooling rack for a good 15 minutes.
  22. To finish, heat up a bit of apple jelly and brush the top of the warm tart with it. Decorate the border of the tart with chopped almonds.
  23. Remove the tart from the pan and transfer to a serving plate.


This beautiful apple tart tastes as good as it looks. I used seasonal apples in my recipe. However, firm but ripe pears can be used instead – if you choose to use pears in this recipe, do not forget to use a pear-shaped cookie cutter (if you are so lucky to own one) or just about any other shape you have on hand.

And if almonds are not your thing, you could easily sub ground and chopped hazelnuts in this recipe.


To serve, I would not produce this straight from the oven. Rather, either enjoy it while just warm, or at room temperature, as is or with a generous dollop of softly whipped cream or vanilla ice cream.


Simple, but delicious and just a little bit classy. Perfect for that mid-November baking session.

Wednesday, November 2, 2016

Caramelized Chicory Quiche with Goat Cheese


While I love soups, always have, always will, I am definitley a quiche kind of person. Soups are generally considered as pure comfort foods, but for me, so are quiches. Quiche recipes are like canvases. They are versatile and it is easy to get creative with seasonal vegetables when putting together a quiche recipe. I love adding different kinds of seasonal veg, local cheeses and copious amounts of soft fresh herbs. I love the way quiches smell when they bake and I love that you can bring left-over quiche to the office and pack slices in lunch boxes for the kids. Always appealing, always delicious, quiches can be served as an informal lunch, grace a buffet table or serve as an elegant appetizer. And quiches can come in all kinds of shapes and sizes. Simply love them.


While much of our winter food is all about soothing and warming comfort food, fresh raw chicory packs a welcome, bitter crunch. It is a well known fact that lots of bitter foods are both tasty and very good for us. It is the bitter compounds in the likes of brussels sprouts and broccoli that provide vital nutrients.


So, why not waken up our taste buds and go for some chicory. Also known as endive in the US, or witloof (meaning white leaf) in Belgium, the humble chicory is a forced crop, grown in complete darkness, which accounts for its blanched white, yellow-tipped leaves. The story goes that a Belgian gardener grew it by accident in the 1840s. He was growing chicory roots to add to coffee and found some had sprouted tasty white leaves, a happy accident.

Chicory can be eaten raw or cooked and comes in red and white varieties.  It has a distinctive, cigar-like shape, about 12cm (4.7 inches) long, and the crisp leaves have a mildly bitter flavor. It is available all year round. When buying chicory, make sure to choose the very best, by looking for firm, crisp leaves and avoid those with dark-green tips, as they are likely to be more bitter.

If the end of the chicory head is cracked or seems discolored, trim it off with a kitchen knife and remove any limp and discolored outer leaves. Then, depending on how you want to use it, either leave whole, separate the leaves, or slice lengthways into halves or quarters. Once cut, you can brush the leaves with freshly squeezed lemon juice to prevent discoloration.

Once picked and exposed to light, chicory leaves start to become more bitter, so they should be stored wrapped in paper to keep out the light and eaten as soon after picking as possible. Keep the wrapped chicory in the crisper/vegetable drawer of your fridge, that way it will last for around a week.

The following recipe of mine is a light tart that melts in your mouth, is feels like a real treat and it’s a cinch to make. There is not even any rolling involved. But if you prefer, you can make your own puff pastry for this.


Caramelized Chicory Quiche with Goat Cheese
(Author: The Kitchen Lioness)


Ingredients for the Pastry
  • a small knob of unsalted butter for buttering the tart pan
  • one round all-butter puff pastry (or make your own)

Ingredients for the Filling
  • 50 g unsalted butter, divided
  • 4 heads white chicory, cut in half lengthways, ends trimmed, washed, dried, then cut into half-rounds
  • sea salt (depending on the saltiness of your goat´s cheese)
  • freshly ground black pepper, to taste
  • 1 ½ tbsp sugar
  • 1 spring onion, washed, dried, sliced thinly
  • 1 garlic clove, finely minced (garlic can be omitted)
  • 200 g cream (such as single cream which has a fat content of 18% or use cream with a fat content up to 30% )
  • 2 eggs (L), free-range or organic
  • 125 g soft goat`s cheese, crumbled into 2 cm pieces (it is nice to use a local variety here)
  • Italian parsley and chives, washed, dried, finely chopped (or use other soft herbs of your liking)


Preparation of the Pastry
  1. Start by lightly buttering your 20cm (8in) loose-based fluted tart pan that is about 5cm (2in) deep. Line the pan with a round of baking parchment.
  2. Place the puff pastry in the tart pan, pressing it firmly against the base and sides. Roll and crumple the overhanding pastry back on to the rim of the pan, lifting slightly above it. Prick the pastry with the tines of a fork. Place the pan on a parchment lined baking sheet and keep cool while preparing the filling.

Preparation of the Filling
  1. Preheat your oven to 200°C (400°F).
  2. On a medium heat, melt the butter in a large frying pan. Lay in the chicory, add salt and pepper, then sauté the chicory for a good ten minutes or until wilted down and golden-colored, add a bit of water during the cooking process if chicory looks to dry.
  3. Add the sugar and let the chicory caramelize for two to three minutes, until light golden in color.
  4. Remove the chicory from the pan and set aside to drain.
  5. Add a bit more butter to the frying pan, add the sliced spring onion and minced garlic and sauté just until fragrant.
  6. Mix the onion mixture into the chicory mixture. Set aside to drain and cool a bit while preparing the egg mixture.
  7. In a medium bowl, combine the cream with the eggs, salt, pepper and the finely chopped herbs,
  8. Scatter the caramelized chicory and onion mixture over the base of the pastry case and pour the egg and herb mixture gently on top.
  9. Scatter the crumbled goat cheese on top and press down lightly.
  10. Bake on the baking sheet in the centre of the oven for 25 to30 minutes or until the pastry is lightly browned and crisp and the filling is set.
  11. Take the quiche out of the oven and leave to cool in the pan for 10 minutes before removing.
  12. Serve warm or cold. As is or with a seasonal side salad.


The trick here, if you can call it such, is that even humble chicory needs a bit of careful cooking. I keep the heat no higher than moderate when I cook this vegetable. Too much browning tends to accentuate chicory’s characteristic bitterness, so I take care to let the color go no further than deep gold.


In this recipe, the delicate, creamy, barely-set filling is a festival of flavors - the saltiness of the goat´s cheese is offset in the most delicious of ways by the sweetness of the caramelized chicory that, at the same time, keeps a slighty agreeable bitter note. A must try recipe!

You should not limit bitter winter leaves like the pale and interesting chicory, or maybe its vivid, rounder cousin, radicchio - to the salad bowl – they are utterly delicious when cooked, too! And when cooked, chicory loses a little of the bitterness that some people find "challenging".

Chicory may be a bit of an acquired taste for some people but once you are hooked, there will be no turning back.