Saturday, June 28, 2014

The Cottage Cooking Club – June Recipes


Today, marks the second round of our online cooking group, the Cottage Cooking Club. As a group, recipe by recipe, we are cooking and learning our way through a wonderful vegetable cookbook written in 2011 by Hugh Fearnley-Whittingstall, called „River Cottage Everyday Veg“.

Hugh Fearnley-Whittingstall is a well-known British chef, TV personality, journalist, food writer and "real food" campaigner, known for his "back-to-basics philosophy". He is best known for hosting the River Cottage series, in which audiences observe his efforts to become a "self-reliant, downshifted farmer in rural England", his aim is to feed himself, his family and friends with locally produced and sourced fruits, vegetables, fish, eggs and meat.

The Cottage Cooking Club online cooking group is meant to be a project aimed at cooking more vegetable dishes, learning new ways to prepare tasty and healthy dishes and share them with family and friends.

We will make an effort to use as much local, regional, organic and also seasonal produce as is resonably possible. With that goal in mind, I prepared quite a few wonderful dishes from the book already.

My first recipe for the June post is the „Baby Carrot and Broad Bean Risotto“.


The risotto was so creamy and colorful, we just feel in love with this dish. The recipe is a straightforward risotto recipe with some white wine and homemade vegetable stock to cook the risotto rice and lovely, sharp freshly grated Parmiggiano Reggiano to round things off. The intriguing and new element in this recipe was the addition of some wonderfully sweet baby carrots and tender, grass-green broad beans.


These early summer vegetables are always nice to use, although I had never used them in that combination before. With respect to the broad beans, we are in the midst of bean season around here and I bought way too many. In mid-June, you cannot get much more seasonal, or much more delicious than food with colourful broad beans. Only brief steaming or cooking is required when broad beans are in their prime but, as the season progresses, the pods get bigger and tougher and then the beans are encased in a thick outer skin. The skins need to be removed and the beans should be cooked straightaway. Which is what a did – this recipe is a unique and delicious way to showcase this ancient vegetable. While we have enjoyed many a broad bean recipe, we were particularly pleased to discover how delicious these are in a risotto.


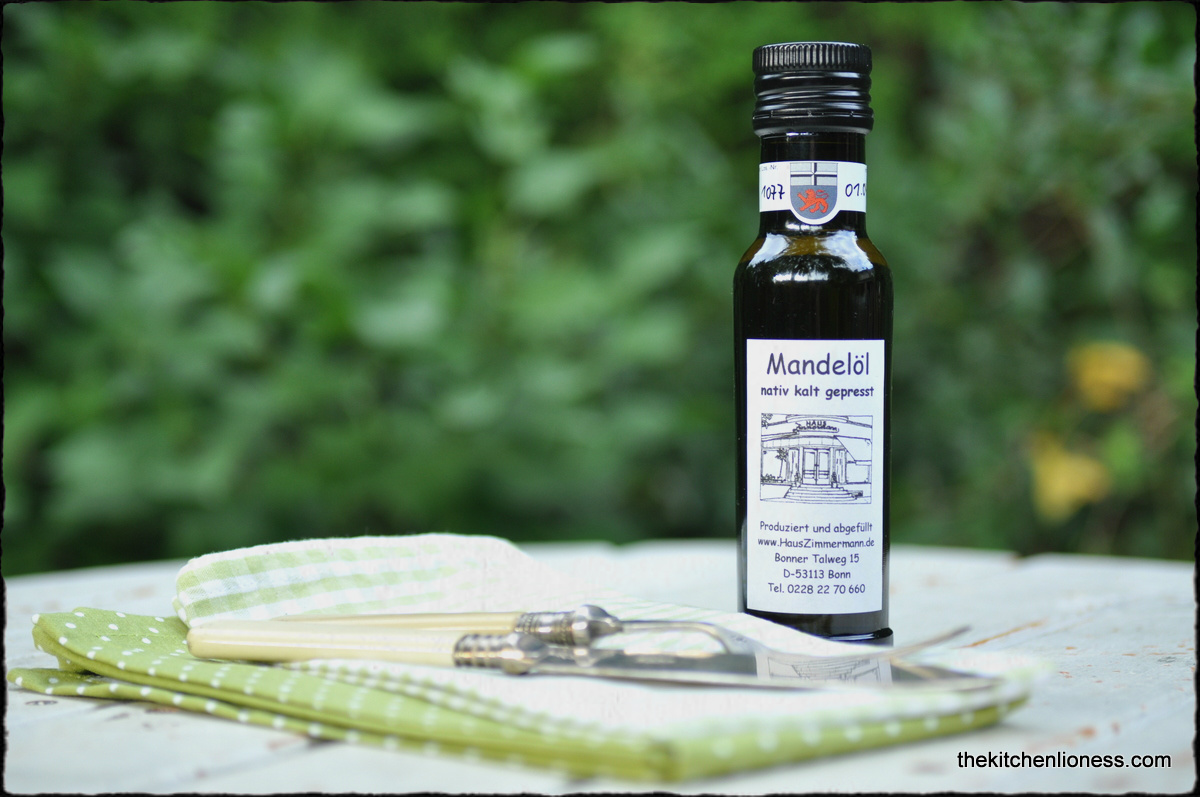
The second recipe I made was the „Crudités with tarator sauce“. Traditionally, tarator is a rich and garlicky toasted walnut sauce (or, as in my case, toasted almond) that is served with fish and chicken and it also works well as a dip and to showcase the bounty of fresh vegetables available at this time of year. I served this unusual dip with cauliflower florets, yellow summer squash, more baby carrots and small cucumber sticks.


While this was a nice new recipe to try, I prefer a less dominant sauce for dipping to let the taste of the individual vegetables shine through a bit better.


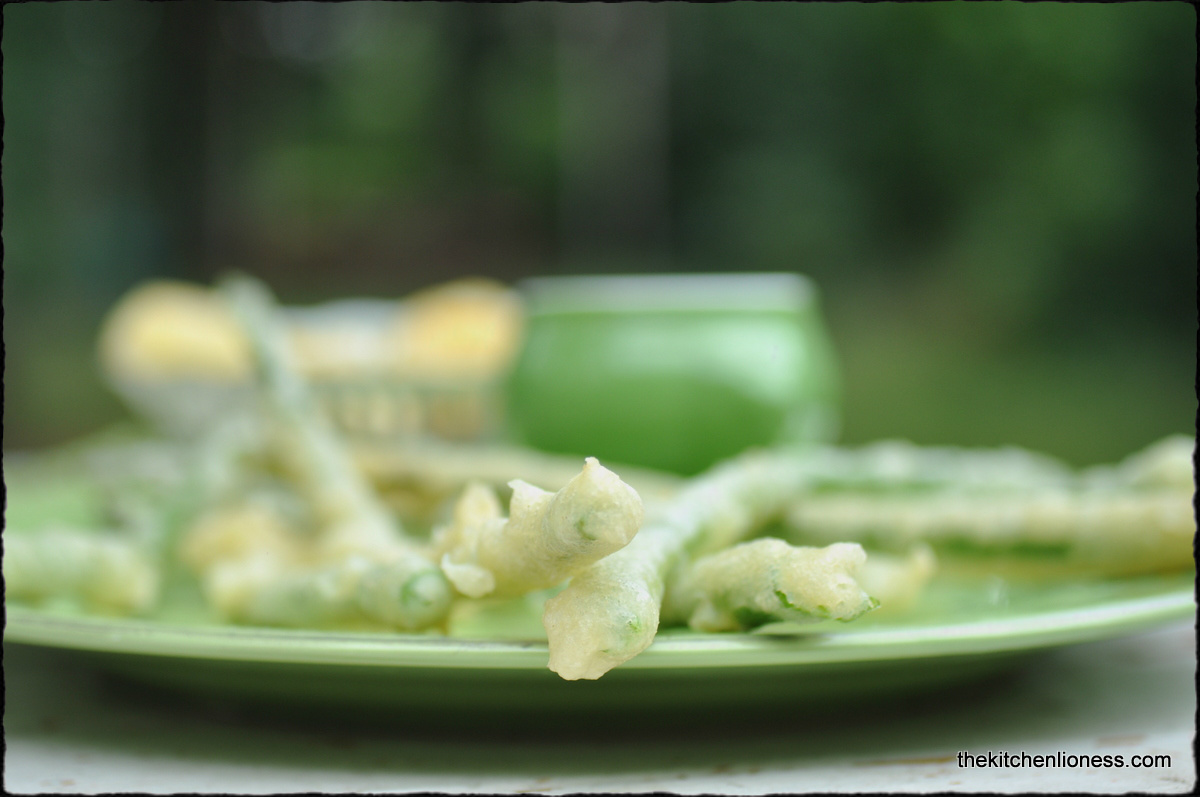
The third recipe I made was the „Vegetable tempura with chili dipping sauce“.


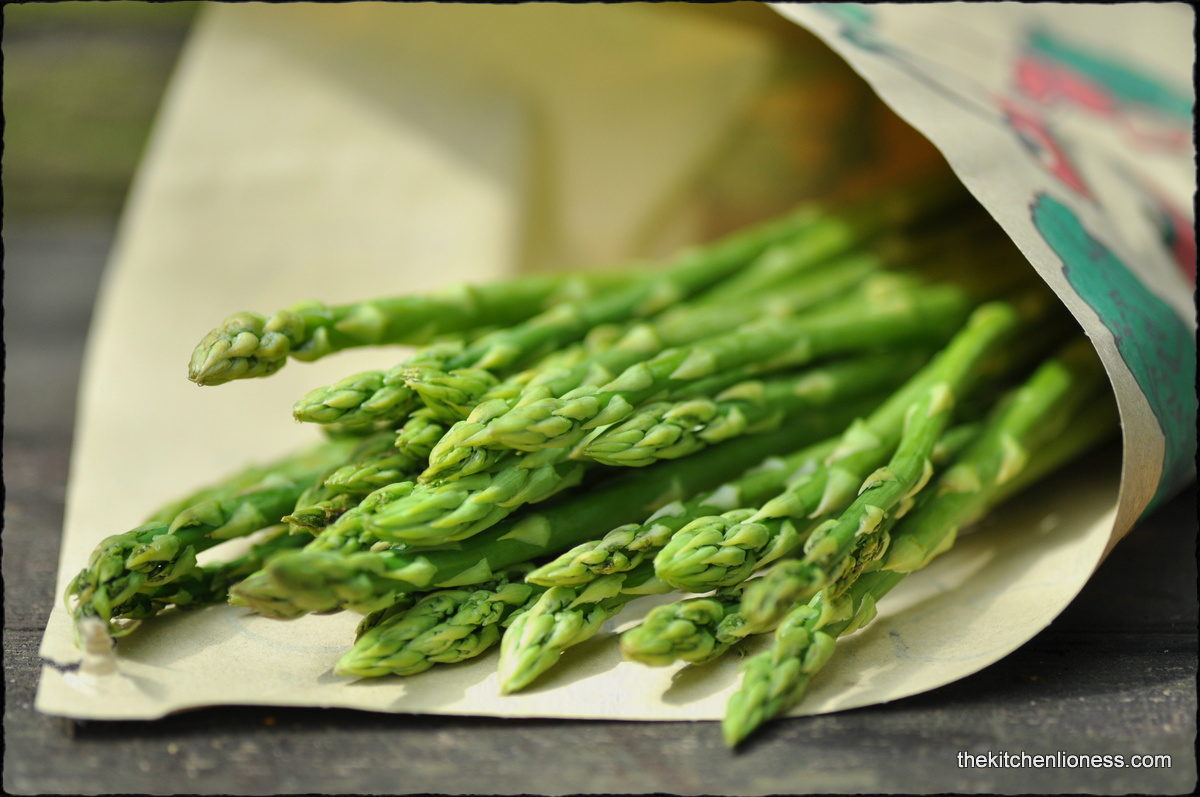
What can I say, my favorite this month. Hands down. What is there not to love about young, tender, green asparagus, yellow summer squash and cauliflower florets deep-fried within a crisp, light coating of tempura batter.


The batter for the vegetables consists of plain as well as cornflour, baking powder, sea salt and ice-cold mineral water.


And the recipe for the wonderful sweet-salty and spicy, out-of-this-world delicious dipping sauce, calls for redcurrant jelly, cider vinegar, soy sauce (I used light soy sauce), chillies, garlic, pepper and coriander (I used thinly sliced spring onions instead). Pleased as punch that the ingredients for the dipping sauce are pantry itemy at our house. Redcurrant jelly is great for cooking and baking and I always have a jar or two at home, it lends a tart, sparkling flavor to foods and is a wonderful compliment to the saltiness of the soy sauce.


What a delightful appetizer – a huge hit at our house!


The fourth recipe this month was the „New potato, tomato and boiled egg salad“. This potato salad has a nice dressing which is light and perfect for this time of year – all you need is some really good olive oil, cider vinegar, mustard (I used Dijon mustard), sea salt, freshly ground black pepper and a wee bit of sugar.


Then boil new potatoes and eggs and add some colorful tomatoes – I used orange, yellow and zebra tomatoes for this recipe instead of the cherry tomatoes – and I adored the colors of this salad. And the ease of the preparation. It is true that you can never have enough recipes for potato salads. And this one is certainly worth making again. The taste of new potatoes is hard to beat and in combination with fresh tomatoes and eggs, these new harvest potatoes taste even better. I topped off the salad with fresh chives and and orange sage flowers. This summer salad is wonderful!


The fifth recipe this month was another favorite of mine. The unbelievably wonderful „Pizza with new potatoes, rosemary and blue cheese“. This recipe calls for the „Magic bread dough“ again – we made that last month for the equally delicious „Asparagus pizza“. I  enjoy making dough and this one is no exception.


Besides blue cheese and fresh rosemary from the garden, the topping for this pizza consisted of leftover, thinly sliced potatoes. It is wise to use some waxy potatoes for this recipe, as you do not want the sliced potatoes to break down too much in that very hot oven. Plus it is easier to slice them with a mandoline (which is what I did) if the potatoes are not floury but the starchy kind.


The blue cheese I bought was a French one, next time I would love to try an Italian gorgonzola dolce, the strong character of that cheese will go wonderfully with the potatoes and the bittersweet, robust flavor of the rosemary.


The sixth recipe was „green all around“ – for the „Steamed veg with a hint of garlic“, I chose fresh green string beans, broccoli, freshly shelled peas, more broad beans and green asparagus – what a feast for the eyes and palate.


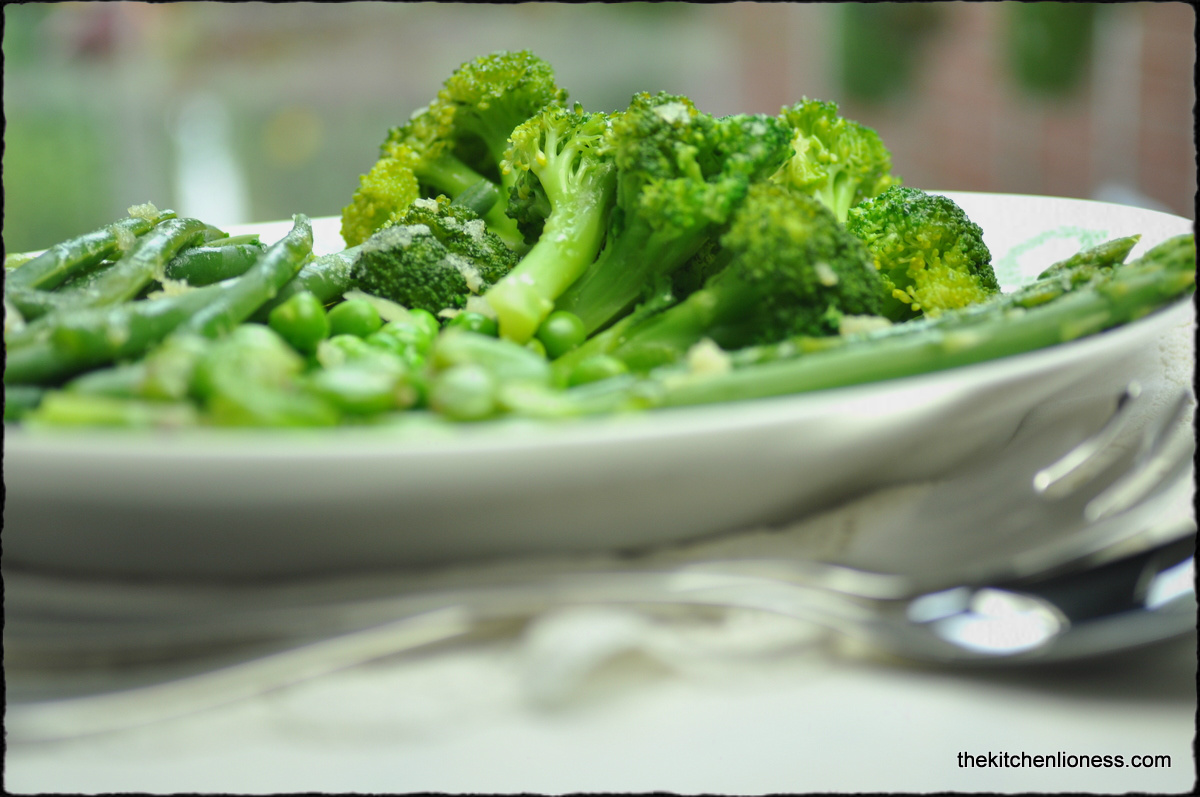
I placed all the vegetables in my steamer basket and after just a few minutes and the addition of some very gently cooked young garlic, butter and coarse salt was, we enjoyed pure vegetable bliss on a platter.


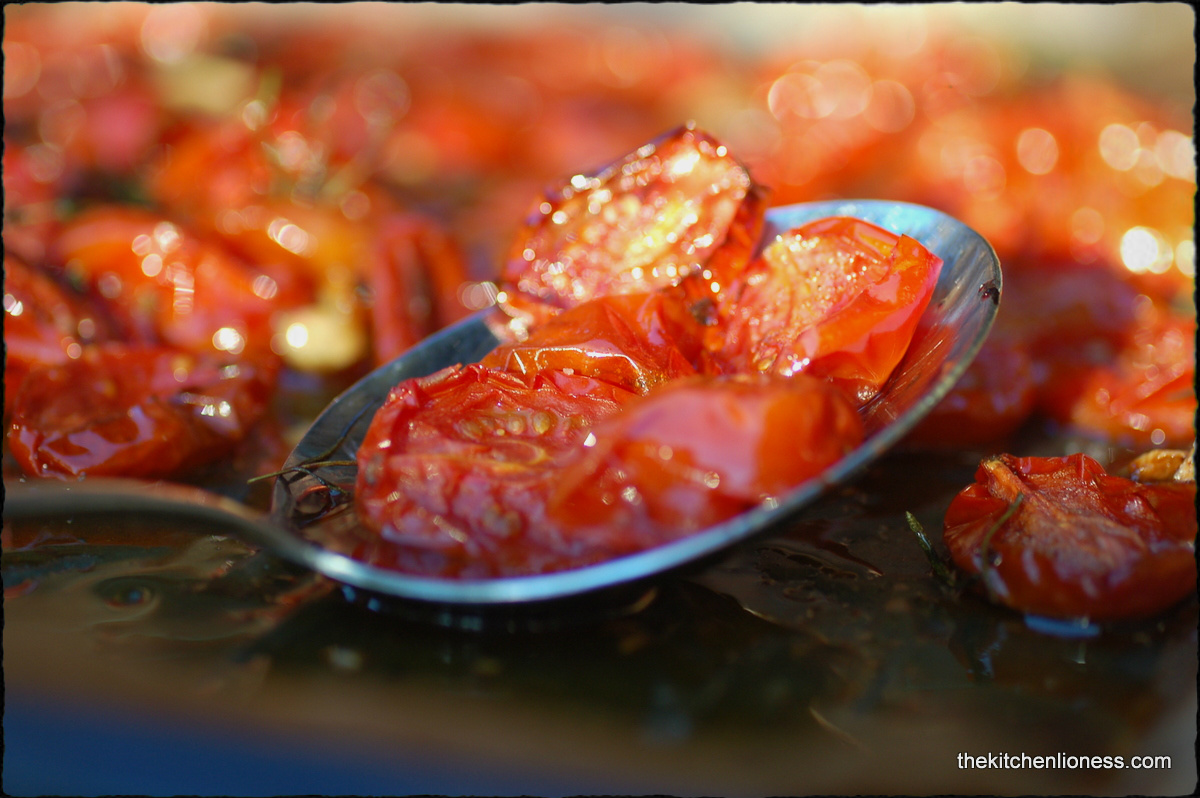
The seventh and last recipe for this month was the „Honey roasted tomatoes“ – what a showstopping way to prepare cherry tomatoes with a hint of garlic and honey – perfect for spooning on some lovely toast or as a side dish for roast chicken. I could not help myself and added some of that rosemary to the cherry tomatoes while they were roasting for a good 30 minutes in the oven. Love that recipe and the way it lets you present those abundantly available cherry tomatoes – next time I make these I would love to try different colors of cherry tomatoes.


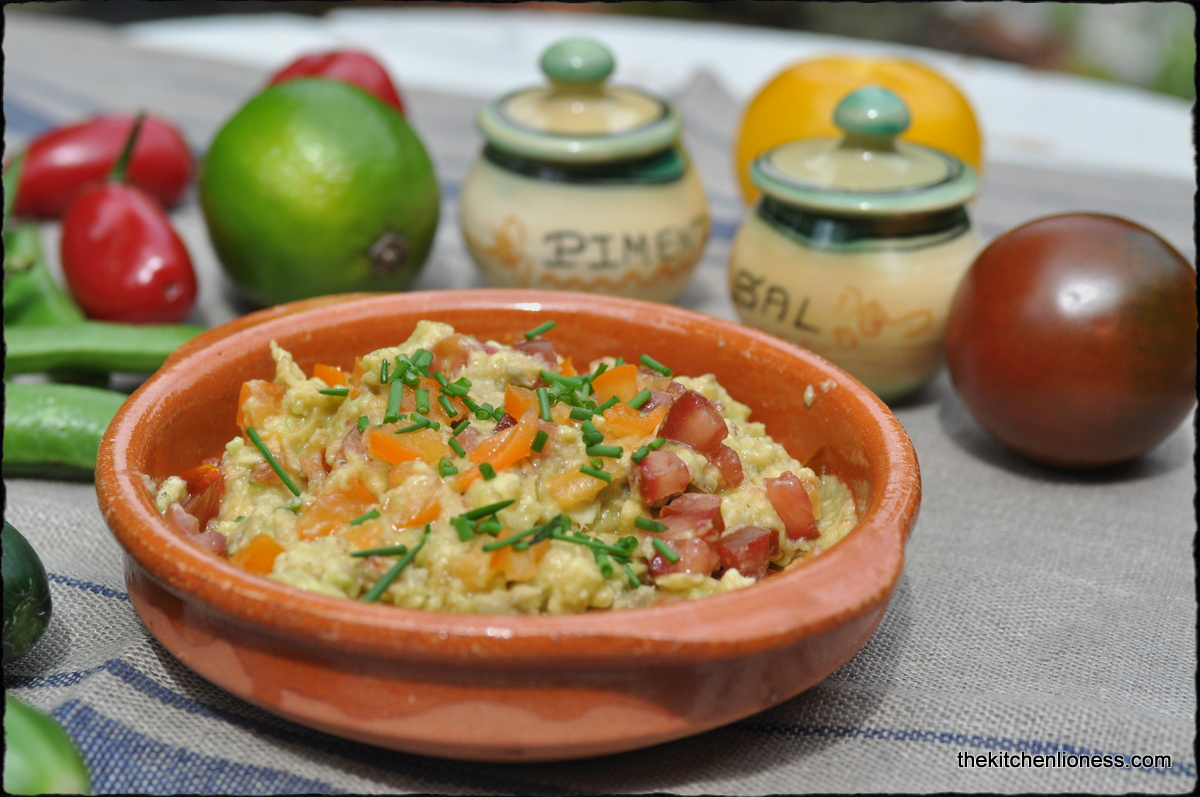
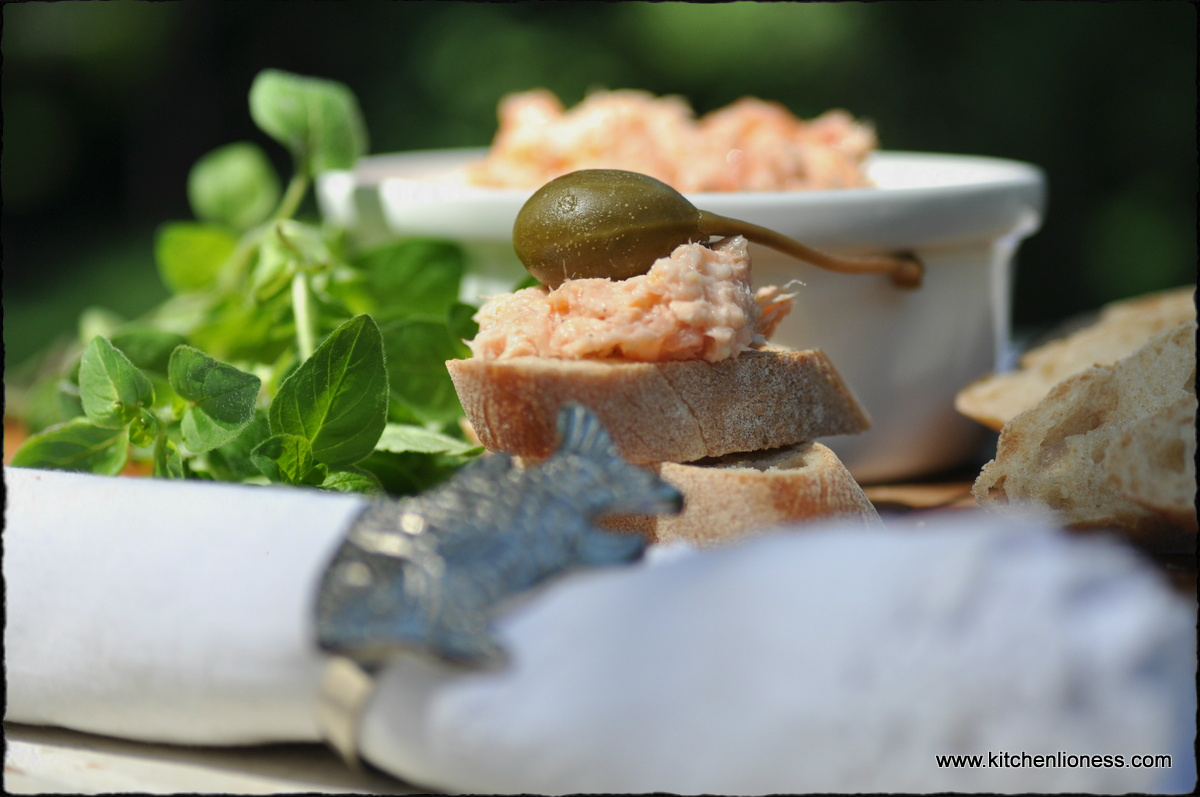
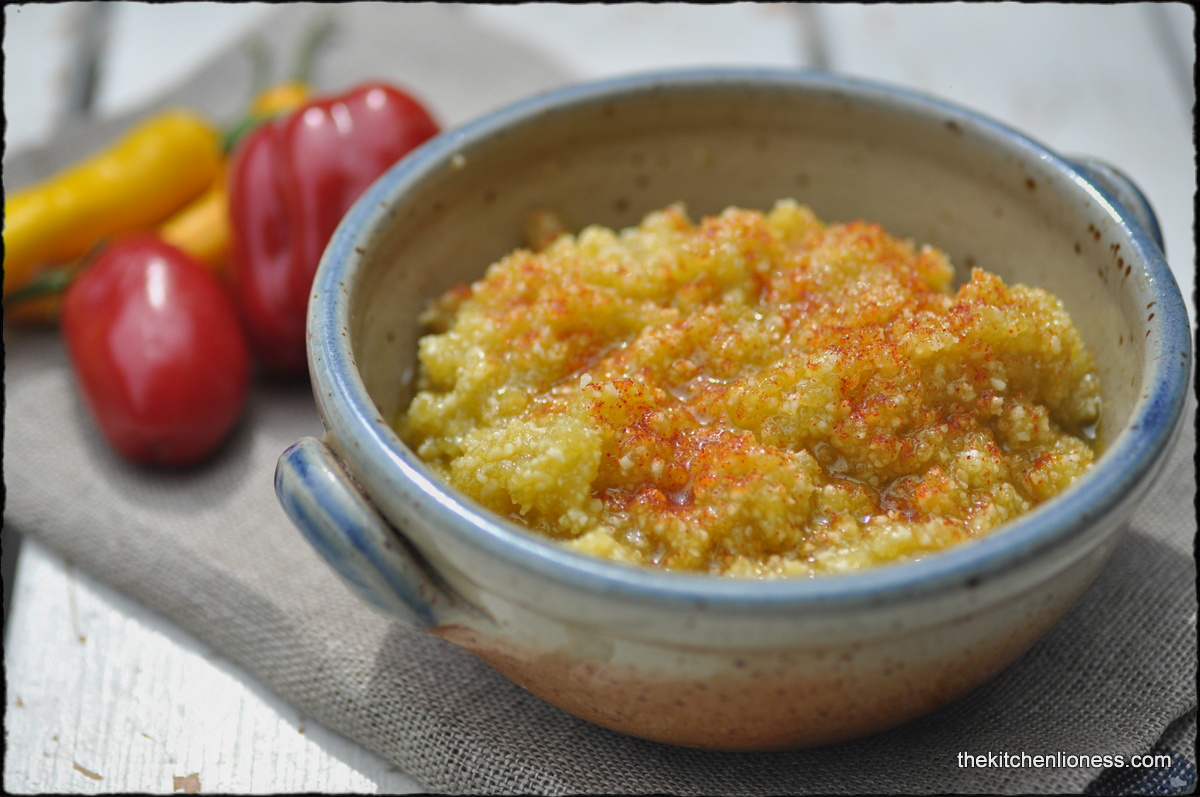
Form my eighth recipe, I took the liberty of preparing the „Carrot hummus“ that I did not get around to making last month – this is certainly a colorful hummus and quite intriguing tasting. With warm spices such as coriander and cumin and such lovely ingredients such as honey, garlic, freshly squeezed lemon and orange juice, plus tahini in addition to those oven roasted carrots, this makes for a hummus with many layers of flavor – I  think this will be a wonderful hummus recipe to keep in mind come fall.


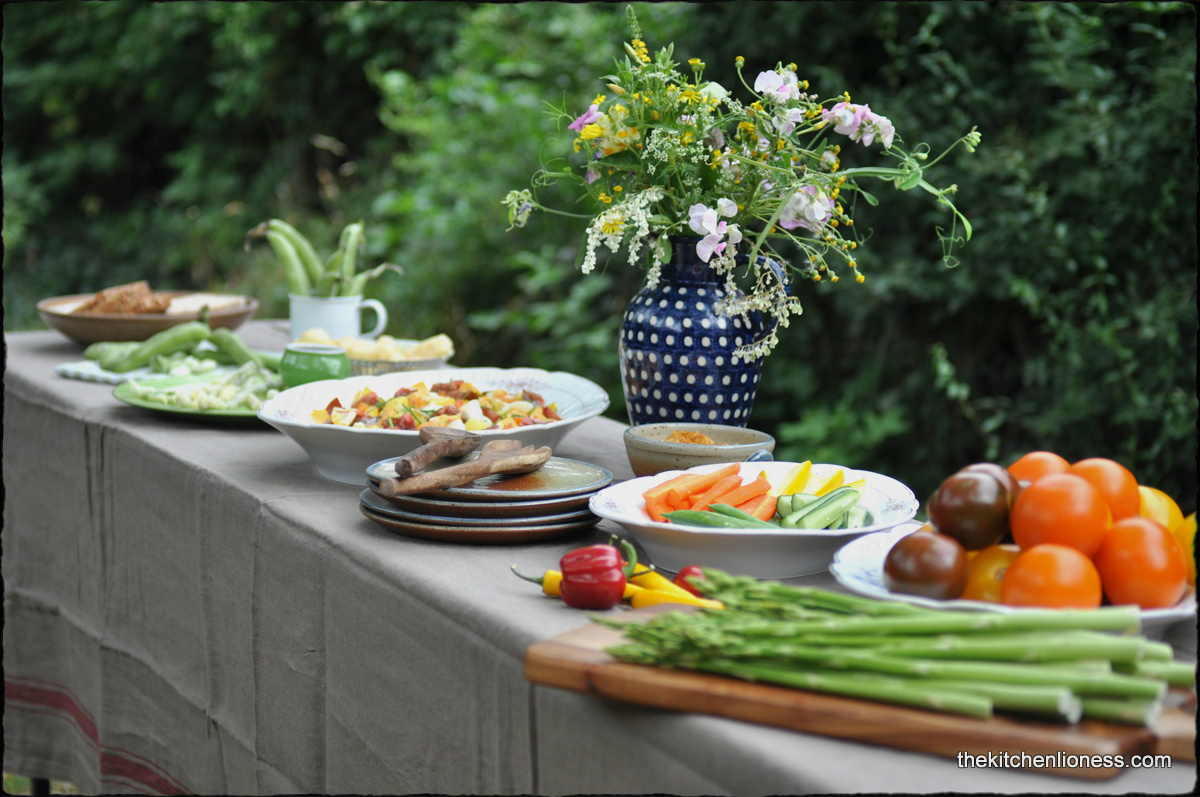
Now, dear readers, if you are still not convinced yet that this is the ultimate vegetable cookbook with absolutely outstanding recipes that make the best use of seasonal vegetables – then why not try a few recipes from this lovely book, set a table outside, invite family and friends, and enjoy the season´s bounty to its fullest! Then you will be convinced! And then join us in our quest to cook through this must-have, unique vegetable book!


Please note, that for copyright reasons, we do not publish the recipes. For more information on the participation rules, please go here.

The designated recipes for the month of June were the following:

Spring onion and cheese tart (page 44), New potato, tomato and boiled egg salad (page 76), Crudités with tarator sauce (page 105), Cucumber and lettuce vichyssoise (page 134), Pizza with new potatoes and blue cheese (page 182), Frittata with summer veg and goat´s cheese (page 232), Baby carrot and broad bean risotto (page 269), Vegetable tempura with chilli dipping sauce (page 308), Honey roasted cherry tomatoes (page 343) and Steamed veg with a hint of garlic (page 372).

To see which wonderful dishes the other members of the Cottage Cooking Club prepared in the month of June, please go here.


Friday, June 27, 2014

French Fridays with Dorie - Guacamole with Tomatoes and Bell Peppers


Today´s recipe for the French Fridays with Dorie group is "Guacamole with Tomatoes and Bell Peppers“.


Guacamole is a Mexican dish of mashed avocado mixed with lemon or lime juice and various seasonings. Sometimes finely chopped tomatoes and onions and peppers are also added.

The ingredients for Dorie´s Guacamole are perfectly ripe Hass avocados, finely chopped red onion, grape tomatoes and red bell peppers, jalapeno, coriander, freshly squeezed lime juice, fine sea salt, freshly ground black pepper and some hot sauce. Easy to find fresh ingredients, the remainder are mostly pantry items. A nice recipe for a Friday evening.


Guacamole can be served as a dip, sauce, topping or side dish. Guacamole is equally delicious as a topping for burgers and as it is as a dip for oven-roasted potatoes and freshly cut vegetables including carrots, garden cucumbers, zucchinis, kohlrabis, baby corn, and radishes. It is also usually served as an accompaniment to fajitas, along with sour cream.

You can make it chunky or smooth (using a pestle and mortar), according to taste. Whichever way you serve it, if you plan on making it ahead of time,  remember to sprinkle the guacamole with lemon or lime juice and cover the surface well with plastic wrap (directly on the surface) because avocados turn brown quite quickly once they are exposed to air. And do keep the guacamole well chilled, al all times.


Guacamole should be zingy and fresh tasting, to cut through the creamy richness of the ripe avocados and Dorie´s recipe delivers – although I did swap the red bell peppers for finely chopped orange tomatoes. Anyway, I never put red peppers in. Ever. But many people, it seems, disagree.

Rick Bayless, one of the finest and most famous Mexican chefs north of the Rio Grande, and an award-winning writer on the subject, describes guacamole in his "Rick Bayless´s Mexican Kitchen" cookbook as "a verdant, thick-textured bowl of festivity, ripe with the elusive flavour of avocado. Mash in a little lime, raw onion, coriander, chilli, perhaps tomato, and the avocado comes fully alive." True.

To see how much the other members of the French Fridays with Dorie group enjoyed this recipe, please go here.

If you happen to own Dorie Greenspan´s "Around my French Table", you will find the recipe for the Guacamole with Tomatoes and Bell Peppers on page 22.


Wednesday, June 18, 2014

Fried Sage Leaves - Salbeimäuse

Sage, was a healing plant of great renown throughout the Middle Ages, although it was also valued as a culinary herb. Today, the tapered, gray-green leaves, are known to give dishes like stuffings and pork sausages their wonderful woodsy fragrance and depth of flavor. Althought there are countless varieties of sage to choose from, most culinary sage used these days is „Salvia officinalis“ (the common garden sage),  or „Salvia fruticosa“ ( Greek sage or three-lobed sage).
Salbei gilt schon seit dem Mittelalter als Heilkraut, aber wurde auch seit jeher gerne als Küchenkraut genutzt. Heute denkt man bei den grau-grünen, ovalen Salbeiblättern eher an eine aromatische Geflügelfarce oder an wunderbar duftende, leckere Würstchen. Die Salbeisorten, die man heute am häufigsten in der Küche verwendet heißen „Salvia officinalis“ auch echter Salbei, Küchensalbei oder Heilsalbei genannt und „Salvia fruticosa“, der dreilappige Salbei, auch Griechischer Salbei oder Kreuz-Salbei genannt. 


We all know the distict texture of its supple leaves, which can be as velvety as rabbits' ears. And you will probably often find yourself rubbing them between your fingers before you start cooking, releasing an intense smell that springs from the oil glands at the base of each leaf hair. Thus, it is the fuzziest leaves that smell and taste the most intense.
Wir alle kennen die besondere Struktur von Salbeiblättern mit der silbrig-filzigen Oberfläche, die sich oft so ein wenig wie Hasenöhrchen anfühlen. Wenn man vor dem Kochen die Blätter zwischen den Fingern reibt, dann steigt einem sofort ein intensiver Duft in die Nase, diese ätherischen Öle sind in den feinen Härchen enthalten, umso mehr Härchen, umso aromatischer duften die Blätter.


Raw sage is usually too intense to eat, you have to cook this herb to bring forth its aromas. Sage is especially popular in Tuscany and other parts of central and northern Italy. For a distictively Tuscan dish called „fagioli all´ uccelletto“, white beans, tomatoes, garlic, and fresh sage leaves are cooked together until the beans are tender and permeated with sage flavor. And when you eat an Italian classic dish called „saltimbocca“, a dish with veal scalopine and prosciutto, it is rather obvious that the bright flavor of the sage leaves is the reason the dish is called "jump in the mouth".

Sage has a bracing effect on rich dishes because its astringency cuts cleanly through fat. Chopped and simmered with mushrooms and cream, it makes a succulent topping for thick slices of country bread. And sage leaves inserted beneath the butter-rubbed skin of a chicken before it is roasted will crisp themselves as the chicken cooks, adding a nice savory crunch to the meat.
Rohe Küchen-Salbeiblätter sind etwas zu intensiv um sie einfach so zu verspeisen. Man sollte schon mit Salbei kochen, um seinen besonderen Geschmack zur Geltung zu bringen. Salbei erfreut sich besonders in der Nord-italienischen Küche großer Beliebtheit. In der toskanischen Küche gibt es zum Beispiel ein Gericht „Fagioli all´uccelletto“ (Weiße Bohnen mit Salbei) bei dem man Salbeiblätter mit weißen Bohnen, Tomaten und Knoblauch so lange köchelt, bis die Bohnen weich und aromatisch sind. Wenn man „Saltimbocca“ genießt, weiß man sofort warum das Gericht aus feinem Kalbfleisch, Prosciutto und frischen Salbeiblättern  „Spring in den Mund“ genannt wird und warum man das Saltimbocca am besten frisch zubereitet verzehren sollte, am Folgetag ist der Salbei sonst schon zu dominant. Salbei wird auch besonders gern bei fetten Speisen wie Braten oder Leber verwendet um die Gerichte besser verträglich zu machen. Aber auch Huhn harmoniert hervorragend mit Salbei.

And no other herb is as delectable as sage when fried, either in extra-virgin olive oil or in brown butter or when encased in a light batter as I have done in the recipe below.
Und kein anderes Küchenkraut läßt sich so hervorragend frittieren wie Salbei, entweder einfach in Olivenöl oder in einem leichten Teigmantel wie bei dem heutigen Rezept.


As already mentioned above, sage was long considered a medicine rather than a food. That fact is obvious from its Latin name. Its Latin name "Salvia" comes from the Latin verb „salvere“ (to save) an obvious nod to its medicinal virtue. The ancient Greeks and Romans are said to have used sage to treat a wide range of ailments. In tenth-century Arabia, physicians even believed that sage had the power to extend life. Sage had emerged as a presence in the kitchen by the time of the Middle Ages, when Europeans began munching sage fritters at the end of banquets to aid digestion. In America, sage was being cultivated as early as the 1630s.
Wie schon oben erwähnt, hatte der Salbei hatte schon früh den Ruf, ewiges Leben zu gewähren und galt eher als Heilkraut denn als Küchenkraut. Der Name „Salbei“ bezieht sich dann auch auf die heilenden Wirkstoffe des Salbeis. Der lateinische Name "Salvia" kommt von dem Verb "salvare", also "heilen".

Schon die alten Römer und die Griechen haben den Salbei als Heilmittel eingesetzt. Im Mittelalter dann wurde Salbei auch als Küchenkraut genutzt und Europäer begannen frittierte Salbeiblätter am Ende eines opulenten Mahls zu sich zu nehmen um das Essen bekömmlicher zu machen. 


For the following recipe making the best of seasonal use possible for that bumper crop of sage leaves, use large, very fresh sage leaves.

If you buy sage, you should look for strong leaves with a bright, fresh color and no yellowish discolorations. The branches should be firm and if you rub the leaves between your fingers, there should be a discernable intense and woodsy smell.

For the Fried Sage Leaves recipe, the leaves are coated with a nice light batter and they puff-up during baking, making them look like little mice, hence the German name „Salbeimäuse“ which, literally translated means „sage mice“. this an even more fun dish to try.
Für das folgende Rezept nutzt man am besten frisch geerntete, große Salbeiblätter außerhalb seiner Blütezeit.

Wenn Sie Salbei einkaufen, sollten Sie darauf achten, dass die Blätter kräftig sind, eine frische und satte Farbe haben und keine gelblichen Verfärbungen. Die Stängel sollten fest sein und wenn Sie leicht mit den Fingern am Salbei reiben, sollte er intensiv duften.

Für die Salbeimäuse werden die Blätter in einen Teig getaucht und in Öl schwimmend ausbacken. Der Teig bläht sich beim Ausbacken auf und die Blätter sehen dann tatsächlich aus wie goldbraune Mäuschen, daher auch der Name des Gerichts „Salbeimäuse“. So ein ausgefallener Name macht dieses Gericht noch sympatischer.


Fried Sage Leaves

Ingredients
  • 20 to 30 freshly picked sage leaves, stems attached – choose large, very fresh leaves for this recipe -  NOTE: the younger the leaves, the less pungent they are
  • 125 grams AP (plain) flour or wholemeal flour
  • 3 tbsps neutral oil or melted, unsalted butter (cooled)
  • 2 eggs (L), free-range or organic, separated
  • 125 ml milk, room temperature
  • some fine sea salt and some freshly ground black pepper
  • canola oil (or other vegetable oil suitable for deep-frying)
  • coarse sea salt for serving
Salbeimäuse

Zutaten 
  • 20 bis 30 frisch gepflückte Salbeiblätter mit Stiel – am besten nimmt man relativ große Blätter - HINWEIS: je jünger die Blätter, je milder sind sie im Geschmack
  • 125 Gramm Weizenmehl oder Weizenvollkornmehl
  • 3 EL neutrales Öl oder flüssige Butter, abgekühlt
  • 2 Eier (L), Bio- oder Freilandhaltung, getrennt
  • 125 ml Milch, Zimmertemperatur
  • etwas Meersalz und frisch gemahlener schwarzer Pfeffer
  • Öl zum Ausbacken
  • grobes Meersalz zum Servieren


Preparation
  1. Rinse sage leaves and pat dry with paper towels.
  2. In a medium bowl, mix together the flour, oil, two egg yolks, milk, salt, and pepper until the batter has a smooth consistency with no lumps.
  3. Cover with a clean kitchen towel and let the dough rest for a good 30 minutes so that the gluten has a chance to develop properly.
  4. Then just before frying, in a clean bowl, whip the egg whites together with a pinch of salt to soft peeks.
  5. Gently fold the beaten egg whites into the batter.
  6. In the meantime, pour the oil in a pot safe for frying (or use your deep-fryer), and heat the oil until it reaches 190 Grad Celsius (375 degrees Fahrenheit).
  7. Once the oil is hot, dip the leaves into the dough mixture individually, and allow the excess to drain off as best as you can.
  8. Carefully drop into the hot oil and fry until golden brown, about 3 minutes.  You have to be careful not to let them brown too much.
  9. Remove the leaves from the oil, and let dry on paper towels.
  10. Continue with the remaining leaves until they have all been fried.
  11. Once all leaves have been fried, sprinkle lightly with coarse sea salt, and serve immediately while still warm.
Zubereitung
  1. Die Salbeiblätter abspülen und mit Küchenkrepp trocken tupfen.
  2. In einer mittleren Schüssel das Mehl, Öl, zwei Eigelb, Milch, feines Salz und Pfeffer mischen und den Teig glatt schlagen.
  3. Mit einen Tuch bedecken und den Teig gute 30 Minuten ruhen lassen, damit sich das Gluten richtig entfalten kann.
  4. Kurz vor dem Frittieren, die Eiweiß mit einer Prise steif schlagen.
  5. Das geschlagene Eiweiß vorsichtig unter den Teig heben.
  6. In der Zwischenzeit das Frittieröl auf 190 Grad Celsius erhitzen  - man kann hier natürlich auch eine Fritteuse benutzen.
  7. Wenn das Öl die richtige Temperatur erreicht hat, die Blätter einzeln in den Teig tauchen und den überschüssigen Teig etwas abtropfen lassen.
  8. Vorsichtig in Öl schwimmend ausbacken. Das dauert ungefähr drei Minuten. Dabei aufpassen, dass sie Blätter nicht zu dunkel werden.
  9. Die Blätter aus dem Öl nehmen und auf Küchenkrepp abtropfen lassen.
  10. Mit den restlichen Blättern genauso verfahren.
  11. Wenn alle Salbeiblätter ausgebacken sind, mit etwas grobem Meersalz bestreuen und sofort servieren.


These fried sage leaves are wonderful as an appetizer. But you can also offer them along with a nice glass of wine, or as garnish for grilled meats or seafood. But they can also be enjoyed with a fresh summer salad for example. And they are particularly delicious if served as part of a cheese spread.
Diese ausgebackenen Salbeiblätter schmecken vorzüglich als kleine, feine Vorspeise. Man kann die Salbeimäuse aber auch zusammen mit einem Glas Wein servieren oder als Beilage zu gegrilltem Fleisch oder Fisch.  Köstlich auch als kleine Hauptmahlzeit zu grünem Salat und als Teil einer leckeren Käseplatte.


Next time you are looking for a healthy herb to add to your cooking, why not try the very lovely sage:
Cur moriatur homo, cui salvia crescit in horto?" (Why should a man die in whose garden sage grows?) - This wonderful Latin adage is from a famous medieval didactic poem on maintaining good health, the „Regimen Sanitatis Salernitanum“ (The Salernitan Rule of Health)

Speciality greengrocers or nurseries often sell a wider range of herbs than supermarkets do. Look out, too, when you visit farmers' markets, for more unusual varieties of robust culinary sage such as golden sage and tricolor sage used for cooking or the more delicate fruit sages such as orange and pineapple sage used in fruit salads, jams, jellies, and tea. 
Wenn man mit einem geschmacklich intensivem und gesundem Küchenkraut kochen möchte, sollte mal ruhig mal den wunderbar eigensinnigen Salbei für sich wiederentdecken: „Cur moriatur homo, cui salvia crescit in horto?" (Warum sollte ein Mensch sterben, in dessen Garten Salbei wächst?) - Dieser wunderbare lateinische Vers entstammt einem berühmten mittelalterlichen Lehrgedicht über Gesundheit, dem „Regimen Sanitatis Salernitanum“.

Oft findet man in guten Gemüseläden und auch in Gärtnereien an großes Angebot an ausgefallenen Kräutern. Wie zum Beispiel die robusteren Sorten wie Goldsalbei und Tricolor Salbei, die sich gut zum Kochen eignen. Oder die etwas feineren Sorten der Fruchtsalbeis wie Orangensalbei oder Ananassalbei, die ganz wunderbar für Obstsalate, Marmeladen, Gelees und Tees verwendet werden können.


„Cur moriatur homo, cui salvia crescit in horto?" -
Why should a man die in whose garden sage grows?


Saturday, June 14, 2014

French Fridays with Dorie - Crab-Avocado Ravioli


Today´s recipe for the French Fridays with Dorie group is "Crab-Avocado Ravioli“. The fresh colors and flavors of this elegant appetizer are so summery and look especially good served on a big white plate. But it does not hurt to also garnish this unusual dish with some fresh chives, purple sage flowers, bright orange apricot balm flowers, and red flowers from an orange sage or other edible flowers.


The original recipe for this dish comes from chef Pascal Barbot of the famous „L` Astrance“, a „3 étoiles au Michelin“ and „5 toques au Gault & Millau“  restaurant on „rue Beethoven“ (could not let that go unnoticed, of course) in that famous city called Paris. Sure sounded a tad intimidating to me. And called for an elegant presentation, at least a good try.

Dorie´s recipe adaptation calls for crabmeat, sea salt, juice and zest of  a lime, shallot, cilantro, and almond oil for the crab salad part. At L`Astrance, the salad has chives but no cilantro and no shallot. And that is the route I followed as well as we are not too fond of cilantro. The most challenging part of this recipe seemed to be the slicing of the avocado for the "ravioli effect". To make sure that I would get a least a few decent slices, I hunted down quite a few perfectly ripe avocoados and sliced them as thin as I could using a very large and sharp knife. You slice the avocado skin on and pit in. Great new technique to learn and extremly challenging if I may say so - these avocado pits are rather unruly if you attempt to slice them...


Although it is technically a fruit, the mild-flavored avocado is used as a vegetable. Native to central America, parts of Africa, Australia, Israel and the Canaries, the Hass variety (considered to be the best), which we get around here has a dark, knobbly skin and hails mostly from Israel. Just a few years ago we used to find less Hass and more smooth-skinned Fuerte variety which I like less because it usually arrives at the store rock-hard and often does not seem to ripen properly despite numerous efforts on my part to ripen them quickly by putting them in a brown paper bag with a banana and keeping them out of the fridge. So Hass it is nowadays at our house. But, as always, I try to go for an unblemished skin, and flesh that gives slightly if squeezed gently, though, of course,  it should not actually be soft.

Other than the above-mentioned crab salad and perfectly ripe avocados, I considered one more element of this recipe to be quite important. The oil. What better excuse to finally go and pay a visit to my favorite oil mill again – right here downtown Bonn. So, when I rushed there last week and got a bottle of their native cold-pressed almond oil, I also picked up my absolute favorite cold-pressed oil of all times for drizzling on avocado, the pistachio oil (remember Anne Leblanc´s  Pistachio Avocado we made back in May 2013 and that can see here). I also bought a bottle of a very mild olive oil to make the Olive-Oil Ice Cream again that we made back in June 2012 (you can see the ice cream here) and that we loved so much.


But back to the almond oil – sweet tasting and light and utterly delicious, this oil is the perfect compliment to the nutty avocado and mild enough to let all the flavors of this lovely dish shine through.

To see how much the other members of the French Fridays with Dorie group enjoyed this recipe, please go here.

If you happen to own Dorie Greenspan´s "Around my French Table", you will find the recipe for these lovely Crab-Avocado Ravioli on pages 185.

For more information about the almond oil and the oil mill, you can go here.

For more information on L`Astrance cookbooks called "Astrance Livre de Cuisine", you can go here.


Monday, June 9, 2014

Grissini with Garden Herbs, Parmesan & Tomato - Grissinis mit Rosmarin, Parmesan & Tomatenpüree


Who doesn't appreciate Grissini, especially when they are homemade.
Man kann nie genug Grissini haben, besonders die selbstgemachten.


Grissini are long sticks of semi or fully crisp bread, they can vary from pencil-thin grissini to baguettes or stirato (Italian baguette). They are said to have originated from the region of Piedmont, Italy, the city of Turin in particular.

According to some, Grissini were invented by the Italian baker Antonio Brunero for Vittòrio Amedèo II of Savoy (1666-1732). But no matter who baked them for the first time, to this date, typical ingredients include wheat flour (I have also tried whole wheat and rye), water, salt, either olive oil or other fat and yeast or other raising agents.
Grissinis sind lange sind dünne, mürbe Brotstangen aus Hefeteig. Sie sind knapp fingerdick mit einer variablen Länge von etwa 30 Zentimetern oder mehr. Als Appetithäppchen sind Grissini traditioneller Bestandteil der Küche Piemonts, besonders Turins.

Man sagt, dass der Bäcker Antonio Brunero die Grissini extra für Vittòrio Amedèo II von Savoyen (1666-1732) kreiert hat. Aber egal wer sie erfunden hat, der Teig für Grissini besteht bis heute meist aus Mehl, Wasser, Hefe, Olivenöl und Salz, teils noch Malz.


To make them even crispier so that they will keep longer, you will nee to „dry them off“ in the oven after the first baking. The traditional „grissini torinesi“ can easily be recognized from their rather chubby appearance, on the other hand, the mechanically formed ones that have become so popular everywhere are rather round-shaped.
Um sie haltbar zu machen, werden Grissini nach dem Backen noch getrocknet, bis die Restfeuchtigkeit verflogen ist. Die traditionellen Grissini torinesi werden von Hand geformt und sind an ihrer typischen verdrehten Form zu erkennen. Die seit dem 18. Jahrhundert maschinell hergestellten sind dagegen in der Regel gleichmäßig rund.


I often find myself making these during the week. I have made them with so many variations and no matter who I serve them to, they are always greeted with great enthusiasm. It has been unseasonally warm around here and all my Italian herbs are growing out of control. So yesterday I made these and decided to flavor half of them with rosemary and parmesan and to add Italian tomato paste to the other half.

 Sometimes I will add chopped sundried tomatoes to the dough or chopped thyme, chili or sea salt. I also make them with different kinds of hard cheese, coarsely crushed black pepper or chopped black Kalamatas or green olives. Almost no limits as to what you can add. They are great served with a good-quality olive oil or your favourite dips for an everyday kind of treat. Or serve them with lovely thin slices of Posciutto wrapped around them and some sweet summer melons on the side.
Unter der Woche backe ich oft Grissini. Gerne auch mal verschiedene Sorten, aber egal welche Sorte ich backe, sie kommen immer wieder gut an. Da das Wetter hier schon sehr warm war, gedeihen meine italienischen Gartenkräuter sehr, daher gab es gestern Grissini mit Rosmarin und Parmesan sowohl als auch eine Variante mit Tomatenpüree, für Farbe und Geschmack.

Neben den einfachen Grissini gebe ich auch gerne sonnengetrocknete Tomaten oder Thymian an den Teig, oder Chili und Meersalz, aber auch gerne mal verschiedene Sorten Käse, grob gemahlener schwarzer Pfeffer oder gehackte grüne oder schwarze Kalamata-Oliven. Man kann die Grissini aber auch einfach zusammen mit ein wenig gutem Olivenöl servieren oder etwas wunderbaren Prosciutto darum wickeln und dann mit süßen Sommermelonen servieren.


Breadsticks are easily made with a simple bread dough. You roll or cut the dough into strips and bake at around 200° C (390° F) for about 20 to 25 minutes, or until golden-brown. Very crisp breadsticks require a second stage in a cool oven at around 120° C (250°F) to become completely dry. Larger breadsticks, like baguettes or stirato, should be used as fresh bread.
Grissini lassen sich ganz einfach herstellen. Aus einem einfachen Brotteig formt man lange, dünne Teigstränge und backt bei 200°C (390°F) für ungefähr 20 bis 25 Minuten, oder bis sie eine goldene Farbe angenommen haben. Möchte man die Grissini haltbarer machen, muss man sie ein weiteres Mal backen und zwar bei zirka 120°C (250°F). Größere Brotstangen wie Stirato sollten wie frisches Brot verwendet werden.


Grissini with Rosemary and Tomato Purée

Ingredients for the Grissini
  • 500g strong white bread flour, plus extra for dusting (Ital.'00' flour is best)
  • 10g fine sea salt
  • 10g dry yeast
  • 400ml tepid water
  • 4 tbsp olive oil, plus extra for oiling
  • 3 tbsps roughly chopped fresh rosemary or any chopped fresh herbs that take your fancy
  • 1/2 cup freshly grated Parmiggiano Reggiano, Pecorino Romano or other hard cheese
  • a few tbsps Italian tomato paste
  • fine Ital. corn flour (farina di mais per polenta), for dusting (optional)
Grissini mit Kräutern und Tomatenpüree

Zutaten für die Grissini
  • 500g backstarkes Mehl ('00' oder Type 550, plus etwas für die Arbeitsfläche
  • 10g feines Meersalz
  • 10g Trockenhefe
  • 400ml lauwarmes Wasser
  • 4 EL Olivenöl, plus etwas um die Schüssel mit Öl zu bestreichen
  • 3 EL grob gehacktes Rosmarin (oder andere italienische Kräuter)
  • 1/2 Tasse frisch geriebener Parmiggiano Reggiano, Pecorino Romano oder anderer Hartkäse
  • einige EL ital. Tomatenpüree
  • ital. Maismehl oder Maisgrieß (wahlweise) 


Preparation of the Grissini
  1. Lightly oil two large bowl with olive oil. Set aside.
  2. Put the flour into the bowl of a mixer fitted with a dough-hook attachment. Add the salt to one side of the bowl and the yeast to the other. Add three-quarters of the water and begin mixing on a slow speed. As the dough starts to come together, gradually add the remaining water.
  3. Mix for a further 5 to 8 minutes on medium speed. The dough should now be wet and stretch easily when pulled.
  4. Add the olive oil and mix for a further two minutes.
  5. Divide the dough in half. Add the chopped rosemary and grated cheese to one half. Add the tomato paste to the other half and mix both doughs until well-distributed. Alternatively, knead by hand.
  6. Transfer the dough into the oiled bowls, cover with wrap and leave in a warm, draft-free area until it has tripled in size (for about an hour).
  7. Line four baking sheets with baking parchment or silicone paper.
  8. Preheat the oven to 220 degrees Celsius (425 degrees Fahrenheit).
  9. Dust your work surface heavily with flour. You can add some semolina too, if you have some.
  10. Transfer the dough onto the surface. It will be very loose and flowing but rather than knocking it back, handle it gently so that you keep as much air in the dough as possible.
  11. Dust the top of the dough with flour and then stretch it out gently to a rough rectangle. Starting at one long edge, cut the dough into strips.
  12. Stretch each piece out until 20 to 25cm long.
  13. Place bread sticks onto each of the prepared baking sheets, spacing them apart.
  14. Repeat with remaining dough.
  15. Bake two sheets at a time on separate shelves until bread sticks are crisp and golden, 15 to 20 minutes.
  16. Transfer to wire racks, and let cool completely. Store up to 10 days in an airtight container.
Zubereitung der Grissini
  1. Zwei mittlere Schüsseln mit ein wenig Öl einpinseln.
  2. Das Mehl in die Schüssel des Mixers (mit Knethaken) geben. Das Salz an eine Seite der Schüssel hinzugeben, die Hefe an die andere Seite der Schüssel hinzufügen. Drei Viertel des warmen Wasser hinzugeben, langsam mischen, dann das restliche Wasser hinzugeben.
  3. Ungefähr weitere 5 bis 8 Minuten auf mittlerer Stufe kneten. Der Teig sollte nun noch ein wenig feucht sein und sich ausziehen lassen.
  4. Das Olivenöl hinzufügen und weitere zwei Minuten kneten.
  5. Den Teig halbieren. Zu einer Hälfte den gehackten Rosamarin und den fein gerieben Käse hinzugeben.  Zu der anderen Hälfte das Tomatenpüree geben. Beide Teighälften gut durchkneten. Das kann auch mit den Händen gemacht werden.
  6. Die beiden Teighälften in jeweils eine eingeölte Schüssel geben, abdecken und an einem warmen Ort so lange gehen lassen, bis sich das Teigvolumen verdreifacht hat (das dauert ungefähr eine gute Stunde).
  7. Vier Backbleche mit Pergamentpapier auslegen oder Silikon-Backmatten verwenden).
  8. Den Ofen auf 220 Grad Celsius (425 Grad Fahrenheit) vorheizen.
  9. Die Arbeitsfläche mit reichlich Mehl bestäuben. Man kann hier auch gerne etwas Grieß (semolina) verwenden.
  10. Den Teig in Portionen auf die Arbeitsfläche geben. Der Teig soll weich sein, aber anstatt ihn zusammen zu kneten, sollte man ihn lieber doch einfach vorsichtig behandeln, damit genügend Luft im Teig erhalten bleibt.
  11. Die Oberfläche des Teigs mit Mehl bestäuben und vorsichtig den Teig zu einem Rechteck ziehen. Vom langen Ende angefangen, in dünne, lange Streifen scheiden.
  12. Jeder Teigstreifen sollte zirka 20 bis 25 cm lang sein.
  13. Die Teigstreifen auf die Backbleche legen, dabei genug Platz dazwischen lassen.
  14. Mit der andren Teighälfte ebenso vorgehen.
  15. Jeweils zwei Backbleche zur geleichen Zeit backen. Dabei sollten die Grissini zwischen 15 bis 20 Minuten backen, bis sie knackig sind und eine golden-braune Farbe angenommen  haben.
  16. Auf Kuchenrosten auskühlen lassen. Die Grissini lassen sich bis zu 10 Tagen in gut schließenden Dosen aufbewahren.


These thin breadsticks are usually sold fully crisp, so they do not go stale as quickly as fresh bread. Like crackers, they can lose their crisp texture overtime, but can easily be re-crisped in a hot oven for a few minutes until they crisp up again.


Meistens werden Grissini verkauft wenn sie trocken sind. Aber auch genau wie Kräcker werden Grissini bei langer Lagerung eher weich, aber man kann sie für einige Minuten in eine heißen Ofen geben, damit sie wieder schön knackig werden.


Friday, June 6, 2014

French Fridays with Dorie - Salmon Rillettes


Today´s recipe for the French Fridays with Dorie group is "Salmon Rillettes" or "Rillettes aux deux saumons".


Rillettes are known to be a kind of pâté made from meat, such as pork, rabbit, goose or duck, which is cooked in seasoned lard, then shredded and pounded to a smooth paste. The paste is then packed into a terrine or into ramekins and served as a cold hors d'oeuvre, to be spread onto toast or bread. But these salmon rillettes are made with smoked salmon as well as poached fresh salmon mixed together. I decided to serve them with thinly sliced baguette and some lovely, crunchy and tangy caper berries (you could, of course, serve this also with other condiments such as quick homemade pickles, or cornichons for example).


To make this recipe you will have to poach the salmon first – the poaching liquid consists of white wine, water, lemon zest, chile, bay leaf, peppercorns, coriander, spring onion tops and sea salt. To this I added a few slices of fresh ginger and a few sprigs of thyme and parsley.


Bring all the ingredients to a gentle boil for a few minutes, then turn down and poach the fresh salmon for about a minute. Take the salmon out of the poaching liquid, let cool and mix with the cubed smoked salmon, finely minced shallots, freshly ground black pepper, sea salt, butter, lemon juice and lemon zest. You are aiming for a coarse, slightly stringy texture. Place in the fridge for a few hours.


A little like a salmon terrine, this dish is terrific with thinly sliced bread, served as a starter. Dorie´s recipe is certainly a quick and easy recipe and perfect for summertime entertaining maybe set into individual ramekins for a sensational starter. Although I must say that the kids devoured this sans dinnerparty guests. I believe this is one of my favorite recipes for an appetizer in Dorie´s book yet.


To see how much the other members of the French Fridays with Dorie group enjoyed this recipe, please go here.

If you happen to own Dorie Greenspan´s "Around my French Table", you will find the recipe for these lovely Salmon Rillettes on pages 26-27.